Quantcast
Channel: Computers and More | Reviews, Configurations and Troubleshooting
Viewing all 161 articles
Browse latest View live

Cooler Master MasterLiquid Maker 240 Review

$
0
0

Cooler Master MasterLiquid Maker 240 - Its all about innovation and great cooling!!


Cooler Master is a well known brand in the PC Hardware industry primarily made famous by its premium Gaming chassis, CPU coolers both liquid and air and recently for their V series PSUs. With the launch of the Master Case 5 they also brought in their new motto of Make it Yours that encouraged users and potential buyers to modify and customize the existing and upcoming CM products as per their needs hence making it theirs! Ever since Cooler Master has been rolling out products with the word Maker which are based around the same theme and even organized events to promote and build up upon the same and its evident that they've done it quite well. But all they lacked in their catalog so far was the oldest epitome of customization in PC industry, an open loop liquid cooler!
Bridging that gap Cooler Master has just launched their very own open loop cooling solution in form of the Cooler Master MasterLiquid Maker 240 which thanks to Cooler Master India is right on my desk today for review and I couldn't be any more excited than this!

With a tentative price of Rs 24,000 in India the MasterLiquid Maker 240 from Cooler Master is their first ever open loop cooling solution till date. Being a 240mm radiator unit the MasterLiquid Maker is a result of an in-house design and doesn't use generic parts, fittings or even designs like most of the other manufacturers hence we are looking at a completely new and different product with no replica or facsimiles which makes it unique in its own rights. Its an all copper build coming in with two CM Master Pro 120 RGB fans and premium coolant which is magenta in color to complete the look.

What's in the Box!?


Cooler Master MasterLiquid Maker 240 comes to us in a big and heavy box with a thin casing on top which is primarily black with a neat image of the product all filled up and working occupying most of the real estate. The product name along with a brief description and Cooler Master logo and motto are printed aswell. Over all its a simple yet attractive packing for this unit.
The back is quite plain with just a description on top and a multilingual feature highlight in the center. At the bottom we find a part by part break down and illustration for a better understanding of the buyer.

Under the outer cover we get the actual packaging which is a big white box having two layers of packing for organized packaging. The first layers is thick foam block with depressions for the primary components and fittings whereas under that we get two carton cases which house the secondary fittings. Over all the packing is very good and we can see quality from the get go itself.

Since the number of components in this package are large in number so I'll break it down in parts for easier explanation, the first layer includes the 240mm radiator, the water block, six G1/4" compression fittings, three caps to seal the reservoir top, a metal mounting bracket, pump and reservoir unit and a 100ml bottle of coolant concentrate.

Inside the two carton cases we have a 1.2m clear pipe along with the user manual and warranty card. The other case houses the two Cooler Master MasterFan Pro 120 RGB Fans, a universal mounting bracket, two LGA 2011/2066 mounting brackets, AMD and Intel backplates, one to three RGB splitter, one to two fan PWM fan splitter, a PWM pump power cable, four female to female RGB header joints, a rubber gasket and a clam shell pack with all the nuts, bolts etc required for fitting everything in place along with a small tube of thermal compound.

A Closer Look at the MasterLiquid Maker 240

The CPU Block


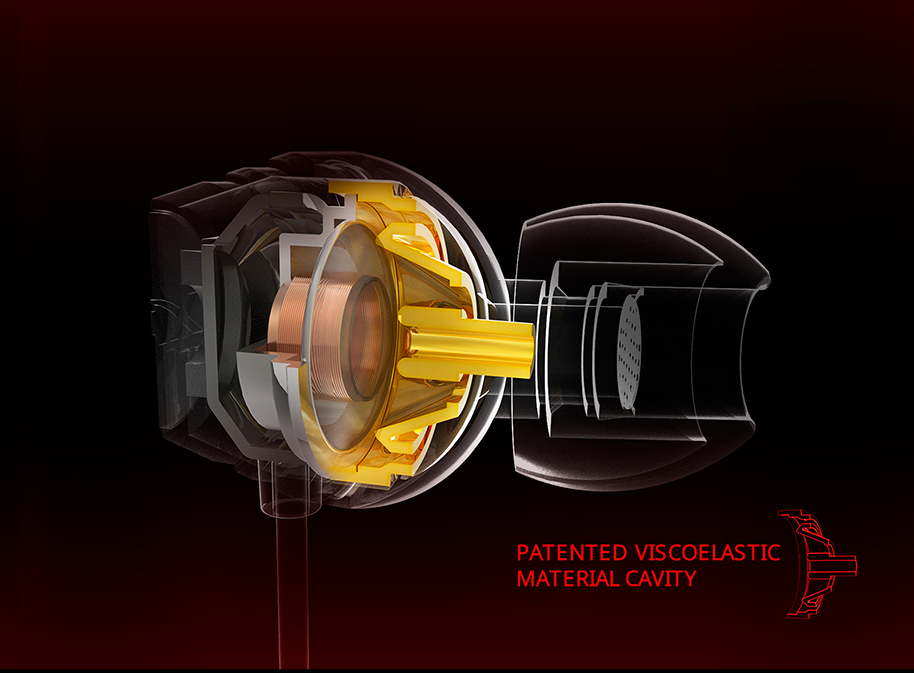
Cooler Master has equipped the MasterLiquid Maker with an all copper CPU block rather than the acrylic/polymer ones that we are used to seeing from almost every other manufacturer in this field which is immediately a big plus point for this product! The block is heavy and is machined entirely out of copper which is nickle plated on top and has a well market inlet and outlet around the standard G1/4 threaded ports for ease in fitting and planning the tubing. Taking a  look at the base we see that it is a well milled copper base which is not mirror polished but extremely smooth with no machine marks or anything to distort the heat dissipation process.

The Pump-Reservoir Combo


Unlike others Cooler Master has gone with an in-house design for the pump for the MasterLiquid Maker 240 rather than the conventional D5 design which as claimed by CM gives their product a zero vibration and zero noise status without compromising upon the performance. Standing at a total height of 200mm this reservoir-pump combo unit is not the shortest one out there and can be mounted on any 120mm fan mount location in the case including the radiator itself if required. The pump is powered by a single PWM connector on the motherboard and draws a maximum of 7.8W which is not only less in terms of power leading lesser heat generation but also means it doesn’t need a direct Molex connector to a power supply & fewer cables inside a chassis is always welcome.
Though we don't have any details on the pressure head or maximum flow on this unit but going by its design and power requirements I'm estimating it to be around 3.5m and 500L/h respectively.
I'm assuming this, which I'm sure is true, that the MasterLiquid Maker 240 is aimed at enthusiasts and gamers and not people who are into those multi GPU full custom liquid cooling rigs as the unit though expandable won't be able to handle an overclocked CPU along with two or more graphics card as the pump just isn't that powerful that it can pass on all that coolant through a CPU block, multiple GPU blocks and even through two radiators which are expected to be used in such builds for optimum cooling.
Whether these limitations matter is arguable. The Maker 240 is not intended as a high-end loop. It isn’t marketed to people cooling twin GTX 1080Tis and Skylake-X. But for any computer up to the level of a quad-core or HEDT CPU and a single GPU, which covers the vast majority of gamers, editors and enthusiasts, the Maker 240 offers plenty of headroom.

Radiator 


The 240mm radiator in the Cooler Master MasterLiquid Maker 240 has solid copper core for both fins, tubes and even the end chambers. The exterior frame is aluminum and like most loop components available today, it uses G1/4 threads on the two ports at the end. It measures in at 29.2mm in thickness and around 20 fins per inch which is really dense for a unit of this thickness giving it a large surface area for cooling. As for aesthetics the radiator is like a block with no fancy projections with a matte black finish over the rough surface of aluminum giving it an elegant yet rustic look which I really like.

Fans


Cooler Master has added two CM MasterFan Pro 120 RGB 120mm fans to the mix here. These are well proven fans when it comes to cooling with over 2000RPM range rated at 66.7CFM genrating around 30dBA at peak which is a well suited unit for this kind of cooler. These come equipped with a PWM header & RGB header to be plugged directly into the motherboard or can be connected to the one to three RGB splitter provided along with the package. Also on-board they have a tiny switch in a depression which can be programmed to red, blue or RGB mode manually, to use the RGB mode you either need a RGB controller or a motherboard that has a RGB header.

Fittings 


The package comes with six G1/4 compression fittings and three threaded lids for sealing the reservoir after filling/refilling or maintenance work. Its noteworthy that these fittings are not only big and look great but also are made out of copper from grade one suppliers which are nickle coated for aesthetics! By now this should be clear that by making every part that the coolant would come in contact with out of the same metal namely Copper in this case, has eliminated or atleast minimized the possibility of corrosion which is the arch nemesis of open cooling loops where the coolant tends to corrode any of the fittings or components due to coming in touch with various metals in the loop. This to quite an extent justifies the price tag of the MasterLiquid Maker 240.

Coolant and Tubing


We get a 100ml bottle of coolant concentrate with the MasterLiquid Maker 240 which is magenta in color with biocide inside for hassle free installation. Though there are no instructions provided along with this as to how much water can be mixed with this much concentrate but according to my tests you can mix the entire coolant concentrate with the amount of water required to fill the loop completely which in my case happened to be around 400ml distilled water.

Cooler Master provides us with a 1.2m long clear tubing with this cooler which should be enough for any mid-tower build and enough for some full tower builds aswell in case one doesn't go berserk with the loop and arrangements, still I would've liked a bit longer tubing of atleast around 2m. The inner and outer diameter of the tube are 3/8" and 5/8" respectively. Its quite thick but flexible aswell about which we'll find out in the installation section below.

The fun part - Installation!


Like every open loop system firstly we would fully rinse out the cooling components including the pump-reservoir combo and especially the radiator with distilled water to remove all traces of the manufacturing process, such as acrylic shavings or loose solder blobs. These can and will get caught in the water block micro-fins and the radiator tubes, decreasing cooling capacity. As you can see in the picture above, with a little zooming in, tiny specs of metal and debris did come out of the radiator so always follow this step.

Now that everything is cleaned and flushed out of any unwanted particles start affixing the compression fittings on the radiator, water block and the pump-reservoir combo tightening it further with a wrench to make sure everything is firmly in place. Since I'm using a LGA 2011 platform here so I've used the LGA2011 fittings whereas you can use the other fittings according the platform you'll be using this cooler with. I'd like to mention here that the CPU block inlet and outlet markings get covered by the fittings so make sure you remember them or refer to the manual in case you forget that.

Once you've arranged everything as per your needs and satisfaction just take the single length pipe & fit it to one end of any component preferably the CPU block and then measure its length to another component. Cut it as flat as you can using a sharp pair of scissors, it's always best to cut the tube a little long and trim again if necessary. Also, don't try to bend the tube too tightly or it will collapse forming a kink and restrict coolant flow. Once all the fittings are done and secured properly just fill the reservoir upto the top with distilled water and connect the pump power cable to a PSU which has been jumped so as to power on the pump only and not the entire system. Keep filling in the reservoir slowly till the water doesn't fill in the whole unit and starts to fill the reservoir itself. Once done just keep some space in the reservoir and add the coolant concentrate to impart color and the mixed biocide for longevity. In total you'll need around 400ml distilled water and the 100ml coolant to make the MasterLiquid Maker 240 go up and running.

In case of the Cooler Master MasterLiquid Maker 240 the installation was super easy even though I've used a compact chassis such as the Corsair Carbide SPEC Omega. The reservoir mounting mechanism is really effective and as you can see I've mounted it at the back of the case where a 120mm fan can be installed. The tubing is thick but even though the space is limited and the tubes are bent to quite an angle there is no kink or abrupt bending nor did I face any problem in inserting it on the fittings or navigating it through the case.

The fittings are thick and look absolutely beautiful and premium imparting a nice touch to the whole loop without hindering the entire theme. Also the CPU block being an all metal unit is a stand out factor for this product and is probably the first thing that anyone is bound to notice. Its neither too reflective nor too dull but a perfect balance to reflect the lights inside the chassis which is a great news for lovers of an all RGB system!
I might be nitpicking here but the only thing that I found odd was that the coolant color is a bit dull than I'd expected originally after seeing the product image on the box but that's just a personal preference many of you might be using a different color coolant altogether to match with your build theme or cover ti with an extra dash of RGB lighting.

Let's put it to Test!

For testing the Cooler Master MasterLiquid Maker 240 we'll be using the following test setup -

CPU: Intel Core i7 5930K
Motherboard:Gigabyte X99 Gaming 5P
RAM:Kingston HyperX Predator 16GB DDR4 3000Mhz
Cooler: Cooler Master MasterLiquid Maker 240
Graphics Card:MSI R9 380 Gaming 4G
Storage: Corsair Neutron XTi 480GB
Power Supply: Cooler Master MasterWatt Lite 700
Case:Corsair Carbide SPEC Omega
OS: Windows 10 Pro 64-bit
RGB LED Strip: Colors from TweakedPC


I've put the MasterLiquid Maker 240 into a pull configuration inside the chassis which is pulling the air from the front. The CPU is kept at stock speeds with boost enabled and temperatures are measured both at idle and at full load. Then we overclock our Intel i7 5930K to 4.5Ghz at 1.45v which is a bit more than what my chip requires to reach that frequency but I had to add some extra heat to it, the same process as that for the stock speed testing is repeated. Temperature is measured using HW monitor with an average being taken of the temperatures recorded on all six cores. MSI Kombuster utility is what I prefer to stress test the CPU at all twelve threads, I run it for a good 15 minutes before recording the temperatures since by then the temperature of the coolant reaches a saturation point.
Secondly, the pump is plugged directly into the motherboard PWM connector while the fans are plugged into the motherboard fan header via the provided fan extension cable. Fan profile was kept at default from the BIOS itself to rule out any discrepancy whatsoever.
The readings would be shown in delta temperature that is after subtracting the ambient temperature of the room while noise levels are recorded from a distance of three feet from the cooler which is a reasonable and practical distance for such tests.

Even though the Cooler Master MasterLiquid Maker 240 is an open loop system and we tend to expect lower temperatures from a unit of this nature but the results that I'm observing here are way beyond my expectations! Not only are the stock temperatures low but even when overclocked the temperatures don't tend to go anywhere above the danger mark even when the cooler is running at 50% speed considering the fact that the i7 5930K here is over-volted to quite a bit for that frequency.

Noise wise the unit is exceptionally quite when running at even 50% speed and is almost silent when set to PWM settings and system at idle but it tends to get noisy when we turn it to 100% speed and this is not the pump which is noisy but the CM MasterFan Pro 120 RGB that it comes with that generate quite a noise when running at over 2000RPM.

My Verdict 

I'm not going to explain you the ins and outs of a custom liquid cooling loop over an AIO here since you know that already or else you wouldn't be reading this in the first place. Coming in at around Rs 24,000 the Cooler Master MasterLiquid Maker 240 goes up against some of the best known manufacturers in this field which might be daunting to look at first but once you hold the kit in your hand and from assembling it to seeing it perform you realize that you have a winner in hand right there!
CM has left no stone unturned when it designed and conceived the MasterLiquid Maker 240, the build quality is not only solid as a tank but there is so much attention to minor details for instance the full metal CPU block which is an absolute rarity and beauty all at the same time. The entire loop is made out of copper including the chrome plated fittings which almost diminishes the chance of corrosion over time giving the loop and upper hand over the competition as longevity is the first priority of such units. The mounting bracket is quite well build and can be used to mount the 200mm reservoir almost anywhere in the chassis possible which is a good news for small form factor PC builders, you can put more coolant in a big reservoir and still fit it inside somewhere atleast inside you case. Installation is super smooth and I didn't find my self struggling with anything whatsoever even though custom loops aren't my forte mainly due to the well thought of design and holistic user manual.
Performance is exceptionally well even for a 240mm custom loop even though I'd fit it inside a closed confined space with limited air flow. According to my tests it shows that this unit is more than capable of handling Intel HEDT CPUs and even the Coffee Lake CPUs for obvious reasons which is exactly what one expects from a cooling solution such as this.
"The Cooler Master MasterLiquid Maker 240 has a sophisticated flare of craftsmanship due mainly to the impeccable designing & bang on cooling performance. Building a system using this cooler can make the most novice builder look like a polished pro at building high end computers" 

Pros - 

  • Great Cooling Performance
  • All copper construction including the fittings  
  • Solid build quality
  • Can fit inside smaller chassis easily
  • Low Noise Pump
  • Installation is easy and hassle free 
  • Metallic CPU Block

Cons - 

  • Coolant color is a bit dull than expected
  • At 100% the unit tends to be noisy
I give it a 8/10 earning our Gold Award!

ADATA XPG Gammix S10 512GB Review

$
0
0

ADATA XPG Gammix S10 - A game changer or just another flash in the pan!?


ADATA has become quite a household name, well a PC enthusiast house to be precise, when it comes to delivering respectable performance at really competitive price tags. Their catalogue is so rich that you can find almost all kinds of storage devices and memories on their website. Recently they unveiled their most aggressive looking SSD till date called the ADATA XPG Gammix S10 which comes with the XPG branding and hence is clearly aimed at gamers and enthusiasts alike. Keep note that this is not their fastest SSD and still resides below the top end SX8000 which is the fastest from ADATA's arsenal till date.
Thanks to ADATA India I have the Gammix S10 with me today for review and by the looks of my expectations from the product are a bit high already.

The ADATA XPG Gammix S10 series lineup comes in an M.2-2280 form-factor, uses PCIe 3.0 x4 and features 128 GB, 256 GB, 512 GB as well as 1 TB capacities and is powered by Silicon Motion’s SM2260 controller and 3D TLC NAND. The 128GB variant carries really low speeds since 3D NAND is not a great choice for low capacity drives but shines bright from the 256GB and above models which also happens to be the sweet spot of SSD storage capacities. Our ADATA XPG Gammix 512GB SSD costs around $170 or Rs 14,700 in India making it the cheapest 512GB NVMe M.2 SSD available in the market today!

What's in the Box!?


With the XPG Gammix S10 M.2 ADATA has brought back their signature XPG packing style with a black and wine red colored box having an an abstract X imprinted in the backdrop. The front clearly specifies the drive capacity, the brand logo and a big product image along with the product name at the bottom left corner.
On the back nothing much is printed except for the product name and vital details such as the various contact details to the ADATA customer care service.

This is a flip show case packaging the first of its kind from ADATA M.2 SSDs and make the product look like a decorative piece mainly due to its aggressive looks. Inside you get the SSD snug fitted inside a thick piece of foam that houses the product in a cavity for extra protection and looks. Overall the packing is apt for a product of this stature and gives it more than enough protection for bumpy transit.

A Close Look at the Gammix S10


Looking at the XPG Gammix S10 you'll notice that its small, I mean like very very small! It complies with the 2280 form factor & hence, measures at just 22mm x 80mm x 3.5mm. The first thing that we note about this SSD is the wine red heatsink that runs over the entire top length of the PCB, this also happens to be the main USP of the product and according to ADATA it can help keep the drive cooler by upto 10°C under load compared to conventional SSDs without a heatsink.

Flip the drive over and you'll find yourself a bare PCB with a warranty and serial number sticker at one end. If looked upon closely the sticker clearly states that this is not a fresh drive but a derivative or refresh of the ADATA SX7000 M.2 SSD, which doesn't have a heatsink on top, with a serial number ASX700NPC & is their entry level M.2 PCIe SSD. Also I noticed that the PCB used for the Gammix S10 is same as that of the SX8000 since all these three drives use the same controller, memory buffer and DRAM layout as per capacity.

About the heatsink its visible that there is a thermal padding running underneath the heatsink metal and the PCB components but due to the depression right in the middle of the heatsink, which is black in color and made out of premium quality plastic, the thermal padding is split into two halves on both sides leaving the center bare and in direct contact with the metal which might hamper thermal conductivity in the long run! A compromise on thermal performance for aesthetics is not the wisest of ideas which I hope ADATA would correct in their upcoming iterations of this XPG Gammix series SSDs.

The controller over here is the quad channel Silicon Motion SM2260 controller. The SM2260 is designed mainly for client and entry-level enterprise NVMe SSDs and features four 8Gbps lanes of simultaneous data flow combined with with eight NAND channels. Other supported features include  Low-Density Parity Check Error Code Correction (LDPC ECC), TBW (total bytes written), Data Shaping and even RAID but has no support for AES-256 data encryption.

ADATA XPG Gammix S10 has three chips of Micron 32-layer 3D TLC NAND on both sides of the PCB with one at the bottom and two on top. These have ADATA written on top but are from Micron with model number NW825 this is due to the fact that ADATA doesn't buy Micron chips by the wafer but individually followed by their in-house binning procedures and packaging. So I'm expecting higher grade TLC NAND chips on the Gammix S10 due to the way ADATA is promoting it.

Besides, the XPG Gammix S10 drive uses a pseudo-SLC caching by dedicating one third of the 384Gbit from the Micron 3D TLC NAND chips creating a large buffer! If its been implemented effectively then we can expect high performance from this drive. A a dedicated 256 MB of DDR3 DRAM cache is also provided to compliment this installation. The module used is the Nanya NT5CC64M16GP-DI IC and is DDR3L-1600 with 11-11-11 timings.

Test Setup and Benchmarks 

We used a new test bench to benchmark the ADATA XPG Gammix S10 512GB NVMe M.2 SSD -
CPU: AMD Ryzen 7 1700 @3.6Ghz
Motherboard: Asus X370 Crosshair VI Hero
RAM:GALAX HOF 32GB 3600Mhz
Cooler: Stock AMD Wraith RGB Air Cooler
Graphics Card:MSI R9 380 Gaming 4G
Storage:Kingston A400 256GB
Secondary Storage: ADATA XPG Gammix S10 512GB
Power Supply: Corsair AX860i 860W
Case: Corsair Obsidian 750D
OS: Windows 10 Pro 64-bit

The drive was easy to fit in and installed without a problem. Following our usual SSD testing methods we formatted the drive and put it as a secondary drive with our main SSD loaded with Windows 10 Pro 64-bit. The entire test suite was run twice to obtain the best possible reading, each session performed after a fresh system restart. Out of the 512GB promised only 477GB on this drive is usable so around 7% of the total space is reserved for memory buffer.

TRIM Check

Since this is a very new SSD for us so it called for some new testing suits aswell, one such tool is TrimCheck which verifies if TRIM function on the drive is working perfectly or not.

This shows that the TRIM function is perfectly working on the ADATA XPG Gammix S10.

Crystal Disk Info V7.0.5

Crystal Disk Info is a great tool for displaying the characteristics and health of storage devices. It displays everything from temperatures, to the number of hours the device has been powered, and even to the extent of informing you of the firmware of the device.

Crystal Disk Info shows us that a bunch of useful SMART attributes are presented to the end user. Total reads and writes as well as NAND writes are shown. The firmware version we are testing with today is version CB1.1.1 with the drive working at optimum temperatures even while inside a closed case and on the Asus X370 Crosshair VI Hero which has the M.2 slot right below the PCB heatsink that happens to be quite a hot area for SSDs.

ATTO Disk

ATTO Disk Benchmark measures transfer rates across specific lengths for any storage system. ATTO uses RAW data, I set my transfer size from 0.5 to 8192kb. This is generally the most reliable benchmarks for today's SSDs.

We clearly see that the ADATA XPG Gammix S10 delivers the exact read ans write speeds that the company claims also its noticeable that its performance is at par or even better than lower capacity drives and definitely way ahead of SATA SSDs for which this is aimed as a replacement.

CrystalDiskMark 5.0.2

CrystalDiskMark is a disk benchmark software that analyses different types of hard drive. Giving sequential benchmark write and read statistics in MB/s. A simple program that is very useful.

Yet again we see similar results over here where the Gammix S10 is blazing ahead of the lot. Also with 34.39MB/s and 122.2MB/s of read and write speeds in the 4K segment the drive proves it point for being suitable for 4K video editing and allied works.

Anvil Storage Utility

The next test is Anvil Storage Utilities, which is a really great piece of software. The SSD benchmark gives you scores for both read and write as well as a combined score.

By now its quite clear that the XPG Gammix S10 is living up to its claim and is ahead of most of the drives.

AS SSD

The AS SSD software determines the performance of Solid State Drives (SSD). The tool contains five synthetic and three practice tests. The synthetic tests determine the sequential and random read and write performance of the SSD. These tests are performed without using the operating system caches. In Sequential tests, the program measures the time it takes to read and write a 1 GB file respectively.


With an overall score of nearly 1800 points the Gammix S10 surly is a great drive and we can see that it does perform very well showing loss only in a few areas which are acceptable considering it a synthetic benchmark and the real life comparison won't yield much difference.

AIDA64 Extreme Edition v5.80

AIDA64 is one of the best tools out there to check the system stability, error diagnostics and even to validate overclocking.
It has a set of suites for almost every hardware out there including SSD/HDD. So we started of with AIDA64 disk suites.

As we can see that the drive is hitting the advertised speeds and is extremely consistent in read and write activities. This is a very good indications since most drives including the bigger SX8000 tends to fluctuate a lot in the Linear and Random Read tests indicating towards a more solid and consistent performance by the ADATA XPG Gammix S10.

HD Tune Pro

HD Tune Pro is one of the most popular hard drive software suites available. It has many different benchmarks and tests built into it. Our first test is the read benchmark, which tests the average read speed and access time of the drive.
It was necessary to use it even after so many tests just to give all of you a graph of how constant the speed is on this SSD as many SSDs tend to fluctuate on the read/write speed which ultimately gives you unstable performance.


The results are obvious that the drive faster than the SATA drives by a large margin but is slower than the higher end SX8000. The Phison S10 controller is famous for heavy workload handling but still we some impressive results here while the drive is under milt to light workload.

PCMark Vantage

We used the PCMark Vantage HDD test which is one of the best range of test suits out there for measuring the performance of any HDD/SSD. Tests are conducted by simulating real life tasks such as Windows Start up, Gaming etc.

With 118000 as the total score and minimum speed at 386.896Mb/s in the 'adding music to Windows Media Player' test the drive comes up with some very impressive stats. This is important since these are emulation of real life usage!

PCMark 8 Professional Edition

PCMark 8 Storage Test unlike PCMark Vantage scores and records the SSD performance through a set of application execution and related tasks such as Adobe Photoshop, Microsoft Office and even through games like Battlefield 3.

The test ran for over an hour and we were presented with impressive scores of 5005 and all applications were executed in respectable time frames.

My Verdict

ADATA employed the IMFT's new 3D flash technology for their XPG Gammix S10 which comes with its own list of merits and demerits. The drive is very fast when it comes to raw performance and can be undoubtedly be used as a boot drive not only for desktops but also for notebooks and ultrabooks due to its universally compatible form factor. The heatsink on the new iteration of the product keeps it cool even under heavy loads erasing the blemish on the initial version that lacked a heatsink & hence ran hot at times. Infact our sample reached a maximum temperature of 45°C under heavy loads which is actually somewhat 10°C lower than what I've seen from other drives without a heatspreaders on this same motherboard and M.2 port location.
The inconsistency that we observed in the SX8000 Micron TLC NAND chips has been overcome here in the Gammix S10 mainly due to the maturity that the 3D MLC NAND has reached and also due to the fact that the drive doesn't throttle due to overheating so ADATA has certainly found the perfect combination here. Being backed up by 5 years long warranty & coming in at around Rs 15,000 the drive is the cheapest 512GB NVMe M.2 SSD on the market giving it some solid brownie points especially for those who are on an ultra tight budget!
On the down side and I might be nitpicking here the XPG logo on the heatspreader is upside down once the drive in installed which is a turn off at a point since it could've been easily tackled with other than that we can't seem to find any flaws with the product.
"I highly recommend the ADATA XPG Gammix S10 512GB NVMe M.2 SSD to gamers, content producers and even system builders who are looking for an upgrade from a SATA drive and want something refreshing for their systems, offering a balance of bang on performance, pricing and eye catching aesthetics."

Pros - 

  • Good Performance
  • Great Aesthetics
  • Heatsink keeps the drive cool
  • Aptly priced
  • 5 years warranty 

Cons - 

  • XPG logo is upside down
I give it a 9/10 earning our Gold Award!

ADATA Shows off XPG Storm RGB M.2 SSD Heatsink

$
0
0
 
Thermal throttling is a big problem for M.2 NVMe SSDs, with drives losing up to 30 percent in sequential transfer rates when overheated. ADATA, with an M.2 SSD product spanning nearly all price-points, is taking the issue of throttling heat-on with its XPG Storm RGB M.2 SSD heatsink. The cooler consists of a chunky aluminium heatsink with coverage area for M.2-2280 drives, a tiny lateral-blower fan, and a cooler shroud with RGB LED lighting. ADATA claims the heatsink reduces temperatures by up to 25 percent.

Its RGB LED lighting supports standard headers, and can be controlled using standardized software such as ASUS Aura Sync RGB, GIGABYTE RGB Fusion, MSI Mystic Light RGB, etc. Unfortunately, the heatsink appears to add Z-height that makes it unfit for M.2 slots located between PCI-Express add-on card slots. At best they're suited for boards with M.2 slots above the topmost heatsink, or just south of the PCH heatsink. The heatsink relies on adhesive thermal-pads and its installation is tool-free

ADATA Shows Off XPG SX8200 and IM2P33F8 M.2 NVMe 1.3 SSDs

$
0
0
 
ADATA showed off its latest M.2 NVMe SSDs that support the latest NVMe 1.3 specification, and are based on some of the newer generation controllers, beginning with the XPG SX8200. This drive combines Silicon Motion SM2262 controller with 3D TLC NAND flash memory, and comes in capacities of 240 GB, 480 GB, and 960 GB. The drive offers sequential transfer rates of up to 3200 MB/s reads, with up to 1700 MB/s writes; and features SLC caching, an LPDC ECC engine, and an internal RAID engine.


The ADATA XPG SX8200 is designed to succeed the XPG SX8000, which is second-fiddle to the company's fastest XPG SX9000-series, and competes with the likes of Samsung 960 EVO series. The ADATA IM2P33F8 implements Silicon Motion SM2263XT controller, which is DRAM-less and has just four flash channels. The drive offers sequential speeds of up to 2400 MB/s reads, with up to 1700 MB/s writes; and comes in capacities of 128 GB, 256 GB, and 512 GB.

ADATA XPG EMIX I30 Review

$
0
0

ADATA EMIX I30 - Bass and some more Bass!!


ADATA is a brand famous for its high end DRAM and NAND Flash products but recently they've come up with something new to venture into the territories of audio devices by launching three dedicated audio products. Carrying the XPG branding ADATA launched the XPG EMIX H30 and I30 headsets and a SOLOX F30 amplifier which are strictly aimed at gamers and promise to deliver ground breaking performance and comfort with catchy designs.
Today thanks to ADATA India I have with me the XPG EMIX I30 in-ear Gaming earphones which is the smaller cousin of the H30 which is a full sized over the head gaming headset.

Priced in at $80 the XPG EMIX I30 sports over-sized 13.5mm monomer drivers with a total impedance of 32Ohms and a design that fits snugly in ear canals rather than taking the over the head approach like most of the conventional gaming audio products do. Also the product features a patented 5.2 channel surround sound experience through the use of inner vacuum tubes that imitate a spatial effect.

Whats' in the Box!?


ADATA brings the XPG EMIX I30 in the new XPG theme packing that they've been following since their new XPG Gammix S10 M.2 SSD with a black and wine red colored box having an an abstract X imprinted in the backdrop along with the product image in the front. The XPG logo and and product name are clearly specified on the top and bottom side respectively along with some feature highlights.

On the side we have a list of all the contents inside the box and the back comes with a well labeled image of the earphones displaying the changeable ear tips, 5.2 surround sound, in-line controls etc. Its a good packaging and over all  justifies the the theme and motive of the product.

Open the box and you'll get everything snug fitted nicely inside a thick black cardboard box which slides out of the outer cover. Content wise we have the EMIX I30 earphones, a splitter cable for connecting to PC and laptops, three different sized ear tips, a splitter adapter or airplane adapter, a user manual and a hard top carry pouch which looks quite premium and can house the earphones along with a few of the provided accessories for traveling.

A Closer Look


The ADATA XPG EMIX I30 are physically quite large compared to normal in-ear earphones and are made up of premium grade plastic shells which looks like metal due to the kind of paints used. The black and red color scheme is what we expect from a XPG line product and so we get the same in the I30 aswell. Also these earbuds boast a 13.5mm driver made out of durable yet reactive monomer materials compared to the 10mm neodymium drivers that we generally come across in products of this category.

An inner vacuum tube allows EMIX I30 to transfer sound in a way that creates a convincing spatial effect. The elastic materials that line this tube move inwards and outwards based on frequency, allowing for a wider range than that offered by standard, non-reactive earphone designs. Each earphone has a micro-subwoofer embedded for bass boost, and together these designs create an impressive surround effect.

Coming with a 1.4m long silicon coated non braided cable the EMIX I30 has an in-line mic and control switch that serves a range of purposes such as receiving/declining a call, playing or pausing a track or even switching to the next track. Since its a single button one needs to get used to using it since everything depends on how many times you press the button for example, a single press will pause and restart music playback and also answer calls or end them, press twice to skip to the next track when playing music and three times to skip back to the previous track.

Connectivity wise the earphones use a four pole 3.5mm jack which is gold plated for enhanced signal transfer and better signal reception and transfer for clearer audio. This makes the product universally compatible with almost every device you can think of including gaming consoles, cell phones, tablets and a PC which puts in a widely useful category and not just a gaming oriented product.

Time to Hit the Cords!

Gaming Performance 


Since the ADATA EMIX I30 aims at gaming, obviously, we tested it with some of our all time favorites, Crysis 3 and Battlefield 1 for its excellent blend of audio, Middle Earth: Shadow of War for its pitch perfect environmental sounds and Forza Horizon 3 well simply 'coz I like that game!
In Crysis 3 we had no issue whatsoever in listening to or understanding what Prophet was saying and noises were fairly distinguished in the heat of battle but were sometimes overpowered by the bass! Battlefield 1 came out fully immersive especially when it came to sitting inside the battle tanks or listening to aerial bombing happening across the field. In Shadow of War we could really feel the voices coming from different directions and interestingly even though the bass on this earphone is heavy and its an earphone and not a headphone I could pinpoint locations of the enemy easily enough. The engines of Bugatti or Lamborghini never revved any better and we were blown away by the deep bass these cups had to offer but again in game chats or when a briefing is going on the background music overpowers it due to the heavy bass that these earphones have to offer.
Overall these earphones are great for gaming especially those that make use of deep bass and treble but you can find yourself at lost when at full volume playing games like CS:GO where in-game chats with your teammate are a vital part of the gameplay since the bass will overpower it. I found the 50%-75% to be the sweet spot of volume with these and you can sail through any type of games with this settings or else 100% is just too much for certain genre of titles.
Also the mic is static free and picks up noise at low levels, a bit of a nasal comes in but with a bit of an adjustment that can be taken care of. Its an in-line mic so you can easily adjust its orientation and placement as per your comfort but for me it worked best in its default placement only.

Music, Movies & Miscellaneous Stuff! 


For movies and music I plugged in the EMIX I30 into a ALC 1220 codec based audio solution on my PC motherboard and also we tested it with an Apple iPhone 5S and iPhone 7 for music playback. Firstly we went in for a wide variety like the dialogue intensive Schindler's List & 12 Years a Slave to high pitch titles like Guardians of the Galaxy Vol 2 and Fast and the Furious 8, all came out in exceptional quality.
Bryan Adam's Heaven and some of my all time favorite Bollywood songs sounded great with exceptional lows accompanied by a good treble. Eminem Legacy and Rap God were as clear as they can be with bass nearing perfection for a gaming headset, even at full volume songs from 3 Doors Down, Motorhead or Metallica didn't crack displaying the true power of the 50mm drivers that it uses. The only issue that one might face is with the mids here since they tend to get over shadowed by the lows and the high bass which is quite common for gaming headsets but this can be overcome by compromising upon the loudness and decreasing the volume to around 75% which most users can since those 13.5mm drivers are quite loud anyways.

My Verdict

Whenever a brand steps into unfamiliar territories it is bound to stumble and fumble but with ADATA I'm pleasingly surprised with what they've done with their EMIX I30 in-ear gaming earphones and not headphones as its mentioned on the box! Considering its their first dedicated audio device they've done a better job than most of the veteran brands in the field especially when you consider the entire package that this product has to offer.
Looks wise the EMIX I30 is really well designed and build using a red and black color theme that would please most of the gamers out there albeit matching their gaming setups. The accessories that it comes bundled with are useful and make it a much more holistic approach with a special mention to the hard carry pouch which completes its on the go gaming and mobile approach. The 5.2 surround sound effect works well & the 13.5mm drivers are really loud and loud enough if you dial down the volume to decrease that bass and treble for watching dialogue intensive movies or playing games that rely heavily on in game chat and briefings.
But all this goodies doesn't mean that the XMP EMIX I30 is perfect, it does have its own shortcomings with the price tag topping the list, its just too expensive for what it has to offer. Its understandable that ADATA doesn't have a scale of economy in this category and that brings the price up but still the $80 price tag is too high for justification. I would've been happier if this was around the $50-$60 mark as that is where this pair of buds truly belong. Also the in-line remote for controls is a bit complicated given the fact that it has only one button to cover all that much, one needs to spend some time just to get familiar with it before putting it to real use. If only there were at-least two buttons to control all this with the number of presses deciding the functions then it would've been a tad bit easier.
"ADATA EMIX I30 is a step in the right direction with some very impressive features up its sleeves. It sounds great, looks solid and does exactly what it should for a gaming earphone but is plagued only by its high price tag!"

Pros - 

  • Bass heavy
  • Sounds great in games, music and movies
  • Comes with good number of accessories
  • Good build quality

Cons - 

  • Bass is overpowering at times 
  • Single button for all the functions 
  • Cable is non-braided
  • Price tag is too high
I give it a 6.5/10 earning our Silver Award!

Asus ROG STRIX RX VEGA 56 OC Edition Review

$
0
0

Asus ROG STRIX RX VEGA 56 OC Edition - Its all about that Raw Unadulterated Power


The wait was finally over last year when AMD rolled out the much awaited Vega cards for consumers in form of the RX VEGA 56 and RX VEGA 64 that not only are their first prominent step in the right direction but also after ages pose a real threat to their Nvidia counterparts in the main-stream division dethroning the GTX 1070 & placing the VEGA 56 in between the GTX 1070 and the GTX 1080 performance bracket! While the RX Vega 56 has been extremely successful and wooed in many enthusiasts and gamers including the ones who were beholden to a particular brand.
Thanks to Asus India I have with me today their latest Asus ROG STRIX RX Vega 56 OC Edition Graphics card for review which is as the name suggest the overclocked version of the Vega 56 and hosts a ton of other features including the ROG branding to say the least.

Asus RX Vega 56 OC Edition comes as one of the two cards that are based on the latest CGN 5.0 14nm FinFET architecture and have the Vega 10 GPU at their heart the same as that of the Vega 64, with 56 out of the total 64 compute units enables hence the name Vega 56 and has 3584 steam processor cores compared to the 4096 as that on the Vega 64. Apart from this the number of TMUs and ROPS are same on both models as 224 and 64 respectively. Our GPU today is clocked in at 1590Mhz boost which is 119Mhz over the reference model while the 20148 bus width 8GB HBM2 memory is at 800Mhz effective just like that on the reference edition so no changes there. All these tweaks give the Asus ROG STRIX RX Vega 56 OC a massive bandwidth of 410GB/s which is enough to handle any title in quad HD resolution.

What's in the Box!?


Asus brings the ROG STRIX RX Vega 56 OC Edition in a big-heavy cardboard box which is mainly black in color with hints of green on the sides. The STRIX and Vega logo along with the graphics card image occupy most of the real estate on the packing while the Aura and VR ready logos are printed clearly at the bottom and the very top right side. At the top left corner we can find the signature 'R' logo which was all started by the Vega Frontier Edition to complete the whole package.

On the back side the box boasts about the 3 years warranty that the card comes with along with various technical and physical features that the RX Vega 56 comes loaded with such as the patented fan blade design, two times more contact area for the cooler, Aura sync etc.


Inside the outer cover you will find a big black box with the STRIX logo printed right in the center. Open this and you get a small envelop nestled inside a foam cavity under which the RX Vega 56 OC rests in a thick foam block wrapped in an anti static plastic bag.

On the accessories front the box included the Asus ROG STRIX RX Vega 56 OC Edition Graphics Card along with the driver DVD, user manual and two ROG velcro cable ties. All in all the packaging is to the point and protective enough to keep this beefy card safe and secure during transit.

Take a Closer Look


The RX Vega 56 from Asus is an elegant looking card with an all black matte finish and a triple fan design which looks old but is infact an all new cooler design to keep this card cool even under extreme loads.

This unit weights in at 1.5Kg and measures in at 29.8x13.4x5.25 cm making it one of the longest and thickest cars you can find on the market today. Infact the card occupies two and a half expansion slots so keep this in mind before buying this card as it can pose an issue for ITX users going for a compact build.
Basally this is the same DirectCU cooler in size, design and specifications as that on the Asus ROG STRIX GTX 1080 Ti cards so as to provide the best cooling experience to this unit since we all know that there is a lot of hot and heavy technology under that hood to be cooled.


At the back the backplate is smooth with a X shaped retention bracket and is decorated with abstract designs all over the surface and the Asus and STRIX logo near the top end. We also find the ROG eye logo at one corner which is RGB LED lit and imparts the signature ROG look to this RX Vega 56 from Asus.

The Asus ROG STRIX RX Vega 56 OC will offer five display connectors; you'll spot two 1.2 certified Display Ports, two HDMI 2.0b connectors and a DVI port. The dual HDMI arrangement is done with VR in mind.
This sort of arrangement enables 4K displays at 120Hz, 5K displays at 60Hz, and 8K displays at 60Hz (using two cables) making the RX Vega 56 the best in class for UHD gaming, VR Gaming, recording and streaming purposes.

The ROG STRIX RX Vega 56 uses a triple fan cooling solution with new IP5X dust resistant patented fan design for better-reliable cooling and air flow experience. There are six heatpipes embedded inside the thick aluminum heatsink, which is divided into two parts, with a nickle plated copper base that makes 40% more contact with the GPU surface for more efficient cooling with lower noise levels.  Since the Vega 56 is rated at 210 TDP this sort of arrangement is more than enough to keep this card cool even under intense load with enough headroom for overclocking which enabled Asus to release this OC Edition.
These fans don't spin at upto 55°C and after that they start spinning in an ordered fashion with the right one spinning first followed by the center fan and then the last left fan when the temperature reached above 60°C to eliminate unnecessary noise. It is also sounds and looks kind of cool to me so a few extra brownie points for this kind of implementation.


At the bottom side the entire graphics card is clean with no heatpipe or anything protruding outside of the huge plastic shroud but just the PCIe connector at one end. While at the top we can see ssupport for power connectors and SLI connectors, yes you can even SLI this monster if you have the need and money well more of money than need I'd say!

The rear houses the RGB header and two extra fan headers that will spin attached chassis fans at the graphics card fan RPM. These fan headers have been carried forward from the precious generation design of Asus STRIX and ROG cards and do a great job in not only providing some much needed fan headers but also are a life saver when working in tight environments such as ITX builds with less space and lesser fan headers on the motherboard! However the use of the RGB header is still questionable since connecting a RGB strip to this header and routing it through the chassis is going to both difficult and impractical.


Due to the heavy and beefy nature of this card Asus has reinforced the entire cooling solution and PCB with a steel bracket cum heatsink that originated from the IO plate and run through the entire area of the PCB aswell as the cooler to impart that much needed tensile strength to avoid the graphics card from sagging under its own weight.

To power the Asus ROG STRIX RX Vega 56 OC Edition we have a two 8-pin PCIe power connectors on top which make it capable of withdrawing 375W on paper which is more than enough or sort of an overkill for a card rated at 210W TDP. This much power is enough to tweak the card for some further overclocking hopefully but it would definitely contribute to excessive heat generation if left at stock settings! Also Asus provides ts signature white LEDs on these connectors which light up and are static when the wires are properly connected and not those power phase activity lights as that on the reference design.

Benchmarks and Overclocking


Installing the Asus ROG STRIX RX Vega 56 OC Edition was easy and it powered up like a breeze once we booted up the system.
GPUZ reported the correct frequencies with 1590Mhz on the clock and 800Mhz on the memory.
For benchmarking the graphics card our new test bench was as follows -

CPU: Intel Core i7 5930K @4.5Ghz
Motherboard:Gigabyte X99 Gaming 5P
RAM:Kingston HyperX Predator 16GB DDR4 3000Mhz
Cooler: Cooler Master MasterLiquid Maker 240 
Graphics Card: Asus ROG STRIX RX VEGA 56 OC Edition

Storage: Corsair Neutron XTi 480GB
Power Supply: Cooler Master MasterWatt Lite 700
Case:Corsair Carbide SPEC Omega
OS: Windows 10 Pro 64-bit

Now overclocking the RX Vega 56 is not like what we usually do with other cards, we just can't dial up the voltages and add in some increments to the clocks till we start seeing screen tearing, dots or system crashes, that won't work here or well not work in an optimum manner. These RX Vega cards depend a lot upon thermals so much as so that you would find a different temperature reading for the card and another on just for the HBM memory on board which has a dedicated threshold of around 85°C. With that being said I firstly started by under volting the card and at -12% I managed a perfect balance of temperature threshold, fan noise and performance gains. At this stage the performance boost was significant at around 9°C drop in maximum temperatures.
Secondly I tried to overclock this already overclocked card at the same -12% power limit and was surprised to have obtained a stable 1670Mhz on the clock and 810Mhz on the memory while keeping the fans at auto as that's what most people would do and not like to have a jet plane inside their chassis! At this point I would like to mention that if I kept the power limit same and increased the clocks or increased the power limit and tried to overclock the card the frequencies that I managed were less or nearly the same respectively but with a lot of heat generation and I had to turn on the fans to 70% to keep the temperatures under check. Keep notice that if you follow this route the performance gains are not that great and you get a very high power drawn along with annoying fan noises all the time!
So be it any RX Vega card and in our case the Asus ROG STRIX RX Vega 56 OC edition would work great if under volted with significant performance boost even if you leave the clocks as they are, its just that you have to tune and find that sweet spot for your card that goes well with your requirements. Our benchmarks today would be at stock and at what we achieved on overclock that is at 1670Mhz clock and 810Mhz on memory.

AIDA64 Extreme edition GPGPU


The AIDA64 GPGPU test not only calculates the read, write and copy speed of the graphics card and processor but is also very useful in observing the SHA-1 Hash and AES-256 score. These are indications of how well the GPU can handle number crunching or real life image or video rendering. Higher score shows a better card.

3DMark Fire Strike & Time Spy


Fire Strike and Time Spy by 3D Mark is a test suit that plays a cinematic scene to determine the FPS, GPU temperature and CPU temperature scaling everything via a cumulative score. It is a great tool to benchmark your GPU since the render is mostly GPU & memory dependent.

Battlefield 1


The latest installation to the Battlefield franchise and mind it the grandest one of them all aswell, Battlefield 1 is a prequel to the infamous Battlefield 1942 placing the players right in the middle of World War 1. Based on the latest Frostbite Engine by EA-DICE, Battlefield 1 takes advantage of DirectX 12 with asynchronous compute to weave together richly detailed worlds. It is heavily taxing on current-generation hardware, and you're handsomely rewarded for investing more into your graphics setup. Settings are at Ultra preset with full HD resolution.

Ashes of the Singularity 


The latest installation to the Battlefield franchise and mind it the grandest one of them all aswell, Battlefield 1 is a prequel to the infamous Battlefield 1942 placing the players right in the middle of World War 1. Based on the latest Frostbite Engine by EA-DICE, Battlefield 1 takes advantage of DirectX 12 with asynchronous compute to weave together richly detailed worlds. It is heavily taxing on current-generation hardware, and you're handsomely rewarded for investing more into your graphics setup. Settings are at Ultra preset with full HD resolution.Developed by Oxide Games & running on the Nitrous Game Engine Ashes of the Singularity is a real-time strategy game set in the future where descendants of humans (called Post- Humans) and a powerful artificial intelligence (called the Substrate) fight a war for control of a resource known as Turinium.
We've used the in-built benchmarking tool and the result is shown in an average of all the graphical tests conducted over various locations and topographies of the game. DX12 API, Quality set to Extreme, 4xMSAA and everything else to high.

Prey


After releasing the excellent Dishonored 2 France-based Arkane Studios hits it out of the park again with Prey, a first-person shooter published by Bethesda Softworks as a reboot from 11 years ago.
Unveiled at E3 2016, Prey uses the CryEngine graphics engine and audio from Audiokinetic's Wave Works Interactive Sound Engine (Wwise). It is exclusively DX11 based so no DX12 or Vulkan testing is possible.

Rise of the Tomb Raider


The latest installation of Lara Croft in the spectacular Rise of the Tomb Raider 2016 with stunning graphics and rich location makes it a great game to benchmark with while enjoying in the due course! We used DX12 and settings were at Ultimate on full HD resolution.

Call of Duty: WWII


Call of Duty: WWII is a first-person shooter video game developed by Sledgehammer Games and published by Activision. Not only is it a a gamer's delight but a graphics card nightmare when all the settings are cranked up offering real life graphics and optimized gameplay.

GTA V


Grand Theft Auto V is an open world, action-adventure video game developed by Rockstar North and published by Rockstar Games. If you like open world adventure then this is something that you don't wanna miss with great graphics, catchy story line and unlimited potential for mods that keep coming in and out every now and then on the web. Our settings are as follows with very high quality, 16xAF, 2xMSAA and FXAA enabled.

Wolfenstein II: The New Colossus


Wolfenstein II: The New Colossus is an action-adventure first-person shooter video game developed by Machine Games and published by Bethesda Softworks. Not only doe it put you in the shoes of a futuristic armored suit, yey suits are back, but also gives you the ability to mow down everyone with all guns blazing! The game is well optimized but beats down upon the graphics card at all settings cranked up resulting in high power draw and heat generation.

The Evil Within 2


The Evil Within 2 is a third-person survival horror video game developed by Tango Gameworks and published by Bethesda Softworks for Microsoft Windows, PlayStation 4 and Xbox One. I personally love playing this game these days in dark room specifically, your preferences might be otherwise. Great gameplay and a well optimized graphical engine make sit a treat for the gamer aswell as for their graphics cad.

Forza Horizon 3


Forza Horizon 3 is an open world racing video game developed by Playground Games and published by Microsoft Studios for Xbox One and Microsoft Windows 10. The game features cross-platform play between the two platforms and is heavily demanding when it comes to PC resources. Our settings are at ultra preset with FPS cap removed.

Noise & Temperature 


The fans on the Asus ROG STRIX RX Vega 56 OC Edition don't spin till the card hits 55°C or more. We recorded the maximum temperature in Celsius that our card hit during extensive gaming & sound was measured in decibels from a distance of 3 feet. This was performed for both stock and overclocked speeds.

My Verdict  

AMD is back and its back for good with the RX Vega series namely as the RX Vega 56 over the 64 since the former delivers around 10% low performance with significantly lower power consumption, heat generation and can be tweaked to almost the same level with a much lower price point.
With that being said I come back to the Asus ROG STRIX RX Vega 56 OC Edition in hand today and boy this is a beast of a card and when I say that I don't refer to the sheer physical size but also to the raw performance & the feature bundle that it comes with. This card can easily mow down any GTX 1070 in the market and even some of the GTX 1070 Tis including those from third party manufacturers in some titles and synthetic benchmarks by its out of the box frequency itself and Adrenaline driver which would obviously get better with time considering the new HBM2 memory that these Vega10 GPUs rely upon. Asus chose the cooler well for its STRIX RX Vega 56 OC and came up with something that delivers impressive performance at low temperatures and minimal noise along with additional fan headers and RGB headers, in case you need them.
Talking about its overclocking potential I'd say that the RX Vega 56 largely depends upon how you handle the voltages on this card and with the Super Alloy Power II components as Asus likes to call them we see a significant boost in performance by simply lowering down the power limit as the power delivery components on board handle everything seamlessly to yield the best possible combination. Even when it comes to increasing clock frequencies the card is not a slouch and I was surprised that I managed to add some extra Mhz on this already overclocked unit all of which was handled by the DirectCU cooler lets say in a cool manner!
Some might argue that the power consumption on any RX Vega 56 is high compared to that on the GTX 1070 or even above models but I say that the Vega 56 is winner when you consider the fact that it offers seamless 1440p gaming performance at a lower price point and saves you another heafty spending through the much cheaper FreeSync monitors. Also with 10.5TFLOPs under the hood the RX Vega 56 beats the GTX 1070 and GTX 1080 that offer just 6.5TFLOPs and 8.9TFLOPs respectively which obviously won't matter in gaming but when you use softwares that actually use that power like Adobe Premier Pro etc then the RX Vega 56 would out shine its competition by a huge margin.
"The RX Vega 56 is the best AMD card till date and with the Asus ROG STRIX RX Vega 56 OC Edition the story gets only better. Solid build quality, unadulterated gaming performance and raw computing force makes this card the go to option for gaming, editing and rendering alike all of which is laced in the ROG goodness making it a worthy main-stream contender"

Pros - 

  • Good gaming performance
  • Solid build quality 
  • Runs cool and quiet under load
  • Higher bandwidth from HBM2 proves helpful at high resolution
  • Can be easily tweaked further for better performance  
  • Compatible Freesync monitors come at no extra cost

Cons - 

  • High power consumption  
  • Unstable pricing and availability
I give it a 8/10 earning our Gold Award!

Acer Debuts the Acer Chromebook Spin 11 at Bett 2018

$
0
0
Acer Debuts Stylish Convertible Acer Chromebook Spin 11 at Bett 2018
  • 360° convertible design keeps touch display sturdy in four usage modes 
  • Two USB 3.1 Type-C ports for fast data transfer, charging, display output 
  • Wide field-of-view webcam is great for video and conferences; Optional world-facing camera captures photos and video in tablet mode 
  • Optional Wacom® EMR (Electro-Magnetic Resonance) Stylus enables natural drawing, note-taking and interactions
  • Up to 10 hours of battery life  for all-day productivity and enjoyment
 
LONDON (January 23, 2018) – Acer has announced its new Acer Chromebook Spin 11 (CP311-1H/CP311-1HN) at The Bett Show in London. Designed for families, students and individuals who want to embrace the ease and security of Chrome, the new convertible Acer Chromebook Spin 11 features a stylish design that can be used in four versatile usage modes. It also features all-day battery life and two USB 3.1 Type C ports for charging and connectivity to external displays.

In addition, the new Acer Chromebook Spin 11 (CP311-1H/CP311-1HN) fully supports Google Play and maximizes the functionality of the device’s 11.6-inch touchscreen display with stylus input. The optional stylus powered by Wacom® EMR (Electro-Magnetic Resonance) technology2 can be used with the Chromebook to provide an excellent digital writing experience that mimics actual pen and paper.

“We are continually innovating to improve every product in our extensive Chromebook line,” said James Lin, General Manager, Commercial & Detachable Notebooks, IT Products Business at Acer. “The new Acer Chromebook Spin 11 continues in the tradition of the Chromebook R 11, which won many awards for its design, performance and strong feature set, and now includes even more features that make life better for our customers, including the latest ports, all-day battery life and solid performance in a stylish, convertible design.”

Acer will be at the Bett show from January 24 to 27 at booth B100, where units of the new Acer Chromebook Spin 11 (CP311-1H/CP311-1HN) will be on display.

Stylish, Convertible Design

The new design of the Acer Chromebook Spin 11 features a sleek silver cross-hairline pattern on the top cover. This unique silky texture provides a premium look and feel that’s ideal for any environment.

The new Acer Chromebook Spin 11’s 360° convertible design ensures users can enjoy an optimized touch experience on the 11.6-inch HD IPS  display with 1366x768 resolution. After using the keyboard for input in traditional notebook mode, customers can open the touchscreen to a full 360° until it becomes a tablet. Plus, customers can stand it up in display mode to get closer to the screen, or use it in tent-mode for small spaces.
The Acer HD webcam located above the keyboard has a wide field of view – so it’s great for including groups in video conferences and Google Hangouts. The optional second webcam is placed on the cover, so customers can conveniently capture images and videos of their surroundings when in tablet mode.

Stay Connected to Peripherals, Wirelessly

The new Acer Chromebook Spin 11 includes two USB 3.1 Type-C Gen 1 ports, which can be used to charge the device as well as other products, transfer data quickly up to 5Gbps, and connect to an HD display to share visuals. The Acer Chromebook Spin 11 also includes two USB 3.0 ports and a MicroSD card reader to access and transfer content. Customers can stay connected to their network thanks to fast and reliable 2x2 MIMO 802.11ac Wi-Fi, and can connect to peripherals via Bluetooth 4.2.

Performance and All-Day Battery Life

Processor options on the Acer Chromebook Spin 11 include the Intel® Pentium® quad-core processor N4200, Intel® Celeron® quad-core processor N3450, or an Intel® Celeron® dual-core processor N3350. It also comes with 4GB or 8GB LPDDR4 memory and either 32GB or 64GB on–board eMMC storage.
The Chromebook Spin 11 is easy to transport in a book bag or backpack. It weighs only 1.25kg (2.75 pounds) and measures 296 (W) x 206 (D) x 19.95 (H) mm [11.65 (W) x 8.11 (D) x 0.78 (H) inches].

Optional Stylus For a Natural Writing Experience

The optional Wacom EMR stylus allows customers to sketch, take notes, capture ideas, as well as interact with programs and apps with precision. The Wacom EMR stylus provides a natural writing experience that resembles using pen and paper. Plus, it doesn’t require a battery and is resistant to accidental drops. The Wacom EMR stylus will come standard on Acer Chromebook Spin 11 CP311-1HN configurations.

Chrome OS Provides Speed, Simplicity and Security

Chromebooks are easy to use and share by multiple users. Customers simply log into their own Google account to access their Gmail, Google Docs, apps, extensions, bookmarks and other information. Chromebooks run on Google’s Chrome OS platform, which provides automatic updates and multiple levels of security to guard users against ever-changing online threats. Many Chromebook customers store their files on Google Drive  which protects files, documents, and photos safely in the cloud, and ensures that the most current version of the file or document is always available and safe, even if the Chromebook is lost or stolen.

Pricing and Availability

Several models in the Acer Chromebook Spin 11 line (CP311-1H/CP311-1HN) will be available in North America in March with prices starting at US$349 and in EMEA in April with prices starting at €379.
Exact specifications, prices, and availability will vary by region. To find out about availability, product specifications and prices in specific markets, please contact your nearest Acer office or retailer via www.acer.com.
###

About Acer
Founded in 1976, Acer is now one of the world’s top ICT companies and has a presence in over 160 countries. As Acer looks into the future, it is focused on enabling a world where hardware, software and services will fuse with one another to open up new possibilities for consumers and businesses alike. From service-oriented technologies to the Internet of Things to gaming and virtual reality, Acer’s 7,000+ employees are dedicated to the research, design, marketing, sale, and support of products and solutions that break barriers between people and technology. Please visit for more information.

DeepCool's Ark 90 cases comes with its own liquid cooling setup

$
0
0

An externally mounted water tube lets you keep tabs on the flow rate

DeepCool has released another case with an integrated liquid cooling solution. Called the Ark 90, this is arguably a better looking chassis than the Baronkase Liquid it launched last month, which itself also came with its own liquid cooler already mounted. In this case, it's a specially designed Captain series liquid cooling system with a 280mm radiator.

The cooler is basically an all-in-one solution, but with a transparent tube that runs down a crevice in the front of the case. This allows you to monitor the flow rate, or at least that's the stated purpose. Realistically, users will probably be more drawn the visual bling rather than the utility.

There is room to fit a second AIO cooler in the front, one with up to a 360mm radiator. Or you can populate the front with up to three 120mm fans.

DeepCool includes four RGB fans with the Ark 90—three 140mm fans attached to the liquid cooler, and another one more in the rear. In addition to the front fan mounts, you can install another three 120mm fans up top.

The case supports up to an E-ATX motherboard no bigger than 305mm x 276mm. For storage, it has three 3.5-inch drive bays and three 2.5-inch/3.5-inch bays.

Tempered glass panels cover the side, front, and top of the main section, with the side panel giving a view of your build. The case also comes with a riser cable to install your graphics card vertically, if you want. There is a little more room for long graphics cards if going that route—up to 400mm when mounting vertically, versus 310mm if sticking with a horizontal install.

The Ark 90 will be available next month for $300.

Sapphire announces the Pulse RX Vega 56

$
0
0

SAPPHIRE PULSE RX Vega 56 - Time to elevate your pulses!!

 
One of the well known manufacturers of Radeon graphics cards, Sapphire, silently announces the availability date of their Pulse RX Vega 56 on Facebook.

Sapphire had the announcement on their Facebook page: Sapphire Technology Club. As seen in the post, Sapphire’s Vega 56 will be added in their Pulse lineup. The Sapphire Pulse Vega 56 model will have an extended heatsink to make way for the Pulse dual fan configuration and allow a better heat dissipation.

Aside from having a large heatsink and dual fan setup, the Pulse RX Vega 56 will also sport a stylish backplate where a switch would also be found; the hardware switch lets the Pulse down shift to a clock speed in which it will have reduced power draw that’ll make way for lower temperature and lower operating noise.


The Radeon RX Vega 56 and Vega 64 was introduced August last year, but only had reference models available at that time. Fast forward to today, a lot of brands have announced the imminent release of their custom design graphics cards that will be imbued with the RX Vega GPUs.

Sapphire's own Pulse RX Vega 56 will be seeing the light of day on the 12th of February as stated in their Facebook post.

CORSAIR K68 RGB - RGB Goodness meets Water Resistance

$
0
0

RGB and Ready For Anything Introducing the Water-Resistant CORSAIR K68 RGB Mechanical Gaming Keyboard 

BENGALURU, India / FREMONT, CA - January 30, 2018
CORSAIR®, a world leader in PC gaming peripherals and enthusiast components, today announced the release of the new CORSAIR K68 RGB water-resistant mechanical gaming keyboard. Equipped with 100% CHERRY MX RGB keyswitches, every key on the K68 RGB is individually backlit and programmable, giving PC gamers virtually unlimited lighting customization in a vivid array of colors. Every keyswitch is also individually shielded from dust and liquid spills to an IP32 protection rating, defending against accidents so that gameplay never has to stop. Loaded with extras, from a removable wrist-rest to dedicated multi-media keys, and fully programmable with CORSAIR Utility Engine Software, the CORSAIR K68 RGB offers ultra-durable RGB gaming.

Like all CORSAIR mechanical keyboards, the K68 RGB uses only German-made Cherry MX gold-contact keyswitches for the utmost in reliability and consistency. Each switch is rated to over 50 million key presses, ensuring that the 50 millionth key press feels just as good as the first. Available with Cherry MX RGB Red switches, which provide a smooth, quiet and linear action, the K68 RGB's keys feel instantly familiar, whether you're typing or gaming.

With stunning RGB lighting embedded into every keyswitch, it's easy to light up K68 RGB in almost any way you can imagine, from smoothly shifting colors and transitions to dynamic reactive effects. Choose from dozens of pre-programmed presets, thousands of user-made downloadable profiles, or create a unique custom lightshow, all from with the powerful CORSAIR Utility Engine (CUE) software. CUE also offers complete lighting synchronization between compatible CORSAIR mice, headsets and accessories with a single click, making it easy for gamers to make all their gear match. Every key is also fully programmable in CUE, from simple re-maps to complex multi-function macros, giving gamers the crucial edge when they need it the most.
CORSAIR has long been the industry leader in RGB mechanical keyboards, and K68 RGB adds a new dimension with the addition of IP32 water and dust resistant shielding. Each Cherry MX RGB key is surrounded by a rubberized shield that stops liquids and blocks dust, without blocking the RGB lighting from shining brightly beneath. Late night soda slip or snack spill? No problem.
With an affordable MSRP of $119.99, you'd be forgiven that K68 RGB's features stop there, but instead it's fully loaded with all the CORSAIR extras gamers have come to expect. A removable full-length wrist rest provides complete comfort, dedicated volume and multi-media controls make audio adjustments instant, and a Windows Key Lock Mode prevents those game-breaking interruptions. K68 RGB is also 100% anti-ghosting with full key rollover, ensuring every key press registers faultlessly. Equipped with the best in CORSAIR lighting, customization and durability, the K68 RGB ensures that whatever happens while you game, you'll be able to play on.

Availability and Warranty
The new CORSAIR K68 RGB Mechanical Gaming Keyboard is available immediately from the CORSAIR worldwide network of authorized retailers and distributors as well as direct from the www.corsair.com webstore.

The CORSAIR K68 RGB Mechanical Gaming Keyboard is backed by a two-year warranty and the CORSAIR worldwide customer service and technical support network.

###

About CORSAIR
CORSAIR is a world leader in providing high-performance PC peripherals and components to gamers, enthusiasts and e-sports athletes.

Founded in 1994, CORSAIR has won thousands of awards for its products including mechanical keyboards, precision gaming mice, wireless headsets, high-performance components that gamers use to build gaming PCs, and the CORSAIR ONE fully integrated gaming PC.

Copyright © 2018 CORSAIR Components, Inc. All rights reserved. CORSAIR, the sails logo, and Vengeance are registered trademarks of CORSAIR in the United States and/or other countries. All other company and/or product names may be trade names, trademarks, and/or registered trademarks of the respective owners with which they are associated. Features, pricing, availability, and specifications are subject to change without notice.

ADATA XPG EMIX H30 and SOLOX F30 Review

$
0
0

ADATA XPG EMIX H30 and SOLOX F30 - Sassy Looks with Splendid Bass


ADATA turned quite a lot of heads last year when it launched their XPG EMIX lineup of audio gears with an in-ear gaming earphone called the XPG EMIX I30 which we reviewed a few days back and the EMIX H30 over the head gaming headset and SOLOX F30 Amplifier. The venture is an interesting move not only for ADATA alone since its their first venture into the field of audio devices but also as a whole since this puts ADATA in a league of manufacturers that deal both in memory devices as well as peripherals!
Today thanks to ADATA India I have with me the ADATA XPG EMIX H30 Gaming Headset and SOLOX F30 Amplifier that happen to be the flagship product of this new EMIX lineup.

Coming with a hefty price tag of $200 the EMIX H30 headset utilizes 53mm neodymium drivers to deliver a thump pumping audio quality at a maximum 20Khz all working perfectly with almost any device you can name of including PC, cell phones, tablets and even gaming consoles of the latest generation.
With an impedance of 32 Ohms and a maximum output power of 150mW we're looking at around a 50mW output higher than competing headsets, which looks quite good on paper and seems impressive for a product that is first of the lot.
As an addition we get features like red lights on the cups, USB connectivity and 7.1 virtual sound experience that we would obviously expect from a headset of this category. For the SOLOX F30 we don't have much to say here but will be discussed later on in the review.

What's in the Box!?


The XPG EMIX H30 gaming headset comes in a humongous box the likes of which I've never seen for a headset so far in all these years of my life, its simply too big even premium motherboards from Asus or Gigabyte don't comes in boxes this big! The box is primarily black and red in color which are the signature color combo for the XPG lineup with the headset, amplifier and stand arrangement in the center and an abstract X shape in the background and the XPG logo at the top left corner.
Product's name is clearly printed in a glossy texture at the bottom end along with a few feature highlights.

Turn to the backside and we get a well detailed and marked diagram of the product with almost every detail about every inch of the product including the headset, mic, amplifier and even the cables. A few more logos and Skype compatibility are highlighted at the bottom side completing the whole package with details and images making it a good & informative packaging from the outside. I would've loved a showcase window on top with a flipper as this product deserves that kind of packaging and showcase so hopefully ADATA would listen to his small suggestion and try to incorporate it in the future batches of the same.


Open the big box and we find everything well laid out inside a foam cavity which is resting inside thick and sturdy black cardboard box which adds that extra cushion and strength to the packaging.
Once you've got everything out you'll get the EMIX H30 gaming headset, the SOLOX F30 amplifier, a headset stand, the detachable mic, a power cum connection cord for the amplifier, a user manual and a carry pouch to carry the headset and amplifier when required for on the go gaming style or just a casual trip to a friend.

A Closer Look 

The XPG EMIX H30 Headset


The XPG EMIX H30 gaming headset is largely made out of premium quality plastic which on the bright side gives it a light weight construction without compromising much upon tensile strength. The entire color theme here is that of black and red which by now has become the universal theme for gaming products and is also that of the XPG lineup so ADATA is maintaining homogeneity here.


Earcups on the EMIX H30 are made out of plastic that has a brushed aluminum like finish accentuated with a chunky XPG branding on the side and a red mesh that lights up bright red when connected to a PC or any other device via the red LEDs underneath. These are connected via the aluminum frame and cannot rotate on the pivot which is something that I'd likes to have here for easy mobility aswell as wearing around the neck comfort.
The foam over here is a memory foam and quite thick and well textured to mimic actual leather while it isn't which gives it nice aesthetics. About there comfort we'll see when I'll be testing them but from the looks they look promising enough.


Headband is made out of solid but flexible aluminum for strength and looks while the leather strap underneath is contoured, has an XPG logo on top and is stuffed with a layer of foam. This band itself is responsible for the adjustment aswell as fitting of the headset on your head since the aluminum headband is non-adjustable at the cups but only apply the clamping force on the ears. This is a good move if you don't like a heavy headband sitting on top of your head but can result in slippage as the leather band tends to slip over hair and skin if you jerk your head.
The head strap is attached to the metal frame via strong and flexible strings that looks sturdy enough but what irks me here is that flat ribbon wire that is sticking out at the edges responsible for the connection between both the cups. This wire is strong but can break or tangle in ear rings, hair clips, beads etc if the user is not cautious enough.

Wire on the EMIX H30 is quite thick, braided with red and black color scheme and is 2.4m long which is more than enough for anyone. It ends up into a USB port and a 3.5mm audio jack for the audio and another one for the mic which are all gold plated for enhanced signal transfer. I would've liked a detachable cable here but that's something subjective to ones own preferences.

The XPG SOLOX F30 Amplifier 


The XPG SOLOX F30 comes bundled with the XPG EMIX H30 and can be bought separately aswell if one wants to use it with any other brand's headset/earphone. The SOLOX F30 is basically an amplifier for the EMIX H30 that not only comes with a bunch of presets and volume dial but it also enables the headset to have that 7.1 channel virtual surround sound experience which can be further customized if require using the XPG Audio Center.
It is made out of premium quality plastic just as the headset and for a change boasts a black and grey color them, than god! The volume dial in the center is with a gun metal finish while the four buttons at the bottom are textured. This amplifier has magnetic strips at the bottom so that it can stick and sit snugly on to the provided stand to avoid falling off when moving.

At the left hand side the SOLOX F30 has a USB port and two 3.5mm ports which are neatly labeled as mic and headset. This is where you can connect the EMIX H30 headset or any other headset/earphone that you are using with it. The USB port is only required here to power the red LEDs on the headset so its not an issue if your audio device only has a 3.5mm jack(s) as the audio optimization works on the jacks only.
Turn to the right and we find two USB ports along with a micro USB port and another 3.5mm port. The micro USB port is to attach the power cum connection cable for the amplifier that's provided with the bundle while the two USB type-A ports can be used to connect any USB based device such as a keyboard/mouse, flash drive, portable HDD and even to charge your phones. The 3.5mm port is to connect any other speaker set or even headset/earphone. Since this 3.5mm port works in sync with that on the other side so you'll listen to the same sound on both the devices and would be optimized in harmony aswell.

The volume knob is a 360° free rotating knob and has a ticking feeling to it when turned and volume is indicated via the LED lit marks on top, by default it will always be set to 50% volume. Apart from that he four buttons at the bottom are namely as the equalizer/mode changing button to switch between the Gaming, Movie, Voice and Music modes, 7.1 virtual surround sound on-off button, mic on-off button and the a very interesting relay button which when red indicates that the main jacks on the left are active, press it again and you'll have purple which turns on the jacks on both side making both the audio devices connected work in sync and a third time press would make it blue muting the main jacks on the left and keeping only the one on the right active.

The wire provided with the SOLOX F30 amplifier is around 1.2m long and is braided ending into two USB Type-A connectors and one mic USB connector which are all gold plated as well for enhanced signal transfer. You only need to connect one of the USB Type-A connectors, which is the bigger one of the two having the USB logo, to make the amplifier and the other USB ports on it work but the other one can be connected if you are using any pair of devices that demand too much power like a portable HDD and cell phone charger in combination.

The Mic


ADATA has provided a full flexible and detachable microphone with the XPG EMIX H30 gaming headset which has -42dB sensitivity and a frequency response of upto 10Khz for crystal clear reception. The mic is unidirectional and can be used with the headset or alone along with the SOLOX F30 amplifier maybe for voice overs or skype calls in a group which is quite handy at times and also makes the mic along with the whole package quite comprehensive and user friendly. It also has a red LED at the tip which lights up when the mic is in use and active.

XPG Audio Center


Although the XPG EMIX H30 and SOLOX F30 combo is quite competent in its own right and are a plug and play device both with Windows and Mac ADATA still went a step ahead and provided the XPG Audio Center for fine tuning and added control over the bundle! You get all the details about the sound on top with the master volume on the right and boldly written Speakers and mic on the side on which we can hover the mouse and get the the related options to select from.


The utility can be downloaded from the official website and has bunch of useful functions and added presets to make the most out of the SOLOX F30 amplifier. Not only does it have equalizer presets for music such as Jazz, Pop, Rock etc but  provides custom tuning ability. We can even change the sample rate for the speakers aswell as for the mic. Though all the other features work just fine except for the Xear Audio Brilliant which on too high a level, however, the setting can become a double-edged sword, because you hear more details and the sound is not quite as deep, but quiet noise sneaking in.
My favorite out of the lot is the Xear Surround Max as it adds that depth to the rich bass that the headset already provides making it even better especially for bass rich music, movies and games so any bass head would love to keep this setting on always. The only down side to this utility is that it may look too bland to a few people out there so I expect ADATA to revamp this utility and give it a more rich and deep cosmetic UI.

Time to hit the Cords - Performance testing!

Are they Comfortable!?


The cushions on the earcups are soft and feel really smooth against the ear without creating any sort of irritation at all. Even though they are leather and non breathable like a fabric they don't cause any sweat or irritation in and around the ear since they apply a perfect clamping force on the ears due to its lightweight construction, infact these are so light that at one point I forgot that I'm even wearing something so big over my head and ears. I've used a lot of headsets and the ADATA XPG EMIX H30 sits on the positive side of the comfort spectrum with being quite light weighted and cozy on the ears making it a comfortable pair of cups.
Also the leather strap headband is perfect for my head-size and so would be for most of you out there. Its quite comfortable and keeps the headset in place even if I jerk my head suddenly all without hurting my head with too much pressure which is what one looks for in any headset & not just a gaming headset!

How do they Sound!?


The sound signature on the XPG EMIX H30 is variable courtesy to the SOLOX F30 amplifier that it comes bundled with and can be altered to ones personal choice and the work in hand at that point of time. Still the Game mode is something that would work out for almost everything that you do from gaming, listening to music or just talking over skype.
This means that in Crysis 3 we had no issue whatsoever in listening to or understanding what Prophet was saying and noises were greatly distinguished in the heat of battle, even of the crickets in the NY jungle! Battlefield 1 came out fully immersive especially when it came to sitting inside the battle tanks or listening to aerial bombing happening across the field. In Shadow of War we could really feel the voices coming from different directions due to the 7.1 virtual surround sound effect which works exactly as it should for a virtual sound solution and interestingly even though these headphones generate significant bass they didn't distort the sounds of footsteps from behind due to good balance of treble and mids intact and I was able to pin point the enemy location making it a great choice for eSport players including CS:GO.
The passive noise isolation isn't too great even though these are leather cups and people around you can listen to what you are listening to especially if you dial up the volume over the 50% mark making it a bit annoying at times. On the other hand noise cancellation is pitch perfect and you I didn't hear anything around me when these are put on even at low volumes which is a great thing for immersive experience.
Coming over to music I don't recommend that you use the Music mode as the Game mode would do the trick but yes you can turn of the Xear Surround Max option in case you want to lighten the bass a little bit. With a good balance of mids-lows and amplification from the bundled amplifier they cover all ends of the sound spectrum well making listening to music or watching movies a great enjoyment. Yes at some points you might feel that the headset is vibrating under its own bass so always keep the volume between the 50%-70% mark as at 100% these cups can get really loud and punchy which is something that most of us might not want or appreciate but a few metal heads might!
In short gunfire is almost percussive, explosions suitably disorientating and dialogue clearly discernible from the background music. In short, you'll be stunned at how good the XPG EMIX H30 sounds.
The bilateral mic on the EMIX H30 is really good for almost everything. At 100% sensitivity the mic pics up your voice perfectly and reproduces it with a certain depth and detailing which is what you need for voice overs or audio calls if not game chats. The only downside is that a bit of nasal comes into play at this high sensitivity which can be get rid off if sensitivity set to 70%-80%. Obviously the nasal factor won't be audible to other if you are just speaking to them but it'll be noticeable if using it for a voice over or streaming purposes.

My Verdict

The realm of gaming audio accessories is dominated by some veteran players like Razer, HyperX and SteelSeries and whatever was left is being filled up by new players like Corsair and Asus so with so much going on around making a place for a brand like ADATA is a tough task in hand which they seem to have tackled pretty well with the EMIX H30 and SOLOX F30 combo! With a well tuned 53mm driver and balanced output that juggles between bass and treble quite effectively we are looking at a headset that does exactly what its meant to do right out of the gates. The plastic build quality is definitely not cheap and shaves off that extra weight from the headset making it a tad bit more comfortable on the head with a reasonable clamping force. The bundled amplifier is not only a welcome addition which not only imparts a wholeness to this package but also does a brilliant job in amplifying the sounds through the various presets and equalizers all with the added benefit of two USB ports for devices and speaker/headphone relay to make that movie watching experience or gaming session with a friends and family a whole lot of fun.
Obviously any audio device with a bundles amplifier would cost more and so does the ADATA XPG EMIX H30 at around $200 but by cleverly using red lights only instead of RGB and premium plastic in place of metal for not only the headset but also for the amplifier they've managed to place this product somewhere in between the premium and enthusiast section. Though the price is not the major issue here a few things can be troublesome for a few people such as the headset cups not rotating at all and sitting stationary which compromises its mobility especially considering the fact that the EMIX H30 is aimed at that coming in with a carry pouch! Also the whole amplifier arrangement with no detachable cable from the headphone can leave you with vines of wires running both on and off the table if you are using it in a tight space which is a subjective draw back obviously.
"The XPG EMIX H30 and SOLOX F30 combo is a strong step in the right direction from ADATA which would surely make its presence felt due to its refined finishing, unique sound signature and the overall impressive appeal that it comes with. If you want something new and refreshing that would add to your precious Gaming setup then this headset should definitely be on your shopping list!"

Pros - 

  • Good sound signature 
  • Heavy and punchy bass
  • Respectable build quality 
  • Detachable mic
  • Lots of useful customization features
  • SOLOX F30 amplifier works as advertised 
  • Comes with a bag and stand 
  • Compatible with a wide range of devices 

Cons - 

  • Earcups cannot rotate 
  • XPG Audio Center looks bland
I give it a 8/10 earning our Gold Award!

CORSAIR Launches New T2 ROAD WARRIOR Gaming Chair

$
0
0

Gaming Comfort for the Long Haul
CORSAIR Launches New T2 ROAD WARRIOR Gaming Chair

 
BENGALURU, India / FREMONT, CA - February 1, 2018
CORSAIR®, a world leader in PC gaming peripherals and enthusiast components, today announced the launch of the new CORSAIR T2 ROAD WARRIOR gaming chair, as well a new version of the CORSAIR T1 RACE gaming chair, updated for 2018. Created for comfort, no matter how long you play, the T2 ROAD WARRIOR boasts a wide seat, tall back, and deep cushion that supports you through the most demanding gaming sessions.

Finished in premium perforated PU leather with two-layer embedded color accents, T2 ROAD WARRIOR is available in five different colors to match any setup, while rollerblade-style wheels ensure smooth movement on most floors, including carpet. Built around a solid steel skeleton and sturdy cast aluminum chair base, adjustable in eight different ways, and assembled in minutes, the T2 ROAD WARRIOR is a gaming chair for the long haul.

With eight different ways to adjust your seat, the T2 ROAD WARRIOR has comfort customization covered. 4D Armrests adjust up and down, slide in or away from the seat, move forwards or backwards and even rotate to ensure each armrest is precisely where you want it. Included neck and lumbar pillows, wrapped in soft microfiber fabric add extra support where you need it the most. The seat base offers up to 17° of tilt, to find the perfect angle for your posture, while the entire seat back reclines an amazing 170°, allowing you to lie nearly flat when you need to grab a moment to relax between matches. Finally, the steel construction class 4 gas lift provides 100mm of height adjustment, as well as 360° of rotation. 
While it's adjustable in eight different ways, the T2 ROAD WARRIOR is incredibly easy to assemble. No extra tools are required, and a two-minute how-to video is all the instruction you need to get your T2 ROAD WARRIOR out of the shop and ready for battle.

Also new to the CORSAIR line-up of gaming chairs is the 2018 edition of CORSAIR T1 RACE. With a design inspired by performance motorsport, the T1 RACE is clad in PU leather and finished with color-coordinated automotive detail stitching. A wide array of adjustment options, including 85mm of vertical movement and 180° of recline, make it easy to find your seated sweet-spot, while rollerblade style wheels and simplified assembly get you moving fast. Finished with microfiber fabric neck and lumbar pillows and available in five different colors, the T1 RACE is inspired by racing, but built to game.
 
Availability, Warranty & Pricing
The new T2 ROAD WARRIOR and T1 RACE Gaming Chairsare available immediately from the CORSAIR worldwide network of authorized retailers and distributors as well as direct from the www.corsair.com webstore.

The T2 ROAD WARRIOR and T1 RACE Gaming Chairs are backed by a two-year warranty and the CORSAIR worldwide customer service and technical support network.

For up-to-date pricing of the VOID PRO range, please refer to the CORSAIR website or contact your local CORSAIR sales or PR representative

###

About CORSAIR
CORSAIR is a world leader in providing high-performance PC peripherals and components to gamers, enthusiasts and e-sports athletes.

Founded in 1994, CORSAIR has won thousands of awards for its products including mechanical keyboards, precision gaming mice, wireless headsets, high-performance components that gamers use to build gaming PCs, and the CORSAIR ONE fully integrated gaming PC.

Copyright © 2018 CORSAIR Components, Inc. All rights reserved. CORSAIR, the sails logo, and Vengeance are registered trademarks of CORSAIR in the United States and/or other countries. All other company and/or product names may be trade names, trademarks, and/or registered trademarks of the respective owners with which they are associated. Features, pricing, availability, and specifications are subject to change without notice.

Razer Cynosa Chroma comes to India

$
0
0

Kaira Global Launches Razer Cynosa Chroma Multicolor Membrane Gaming Keyboard

Entry level, spill-resistant gaming keyboards with full lighting customization and individually backlit keys

BENGALURU, India - February 5, 2018

Kaira Global Technologies, an IT distribution house driven by the passion to provide customers quality products, today announced the availability of newly launched Razer Cynosa Chroma in India. Cynosa Chroma line of products are feature-packed but value-priced family of gaming keyboards complete with the personalization and immersion factors that gamers need.

"Razer™ is undoubtedly known as a company for their robust and high-quality gaming accessories. Unsurprisingly, that continues to be the case with the Razer Cynosa Chroma line of keyboards. The keyboards are feature rich entry level products best made for beginners or casual gamers. The ergonomic and spill-resistant durable design, simple set up and LED backlighting are a perfect mix of price to performance ratio," said Manoj Attal, Director at Kaira Global.
Unlike other value keyboards, each key on the Cynosa Chroma is customizable and individually backlit with 16.8 million color options. Officially integrated lighting profiles that change dynamically during gameplay can be activated upon installation for "Overwatch™,""Quake Champions™,""Diablo™" and other popular games. The Razer Cynosa Chroma is the first Razer keyboards interfacing with Razer Synapse 3 (Beta) software. Synapse allows users to choose lighting and performance parameters, including their own macros and key binds, and it can be accessed from any computer. The newest version of the cloud-based configurator allows more customization than ever before, with new lighting effects, settings and more.

Price, Availability & Warranty

Razer Cynosa Chroma comes with MRP of Rs. 4999/- and is available with Kaira Global Technologies carrying the warranty of 1year.

Features:
 
###
About Kaira Global
Kaira Global markets and distributes computer components, peripherals, accessories and networking products from over 16 global brands. It has distribution offices in Singapore, Malaysia, South Africa, Mauritius, Sri Lanka and Reunion Islands, and has alliances with channel partners in India, Pakistan, Bangladesh and Nepal.To know more, please visit: www.kairaglobal.com

About Razer™
Razer™ is the world's leading lifestyle brand for gamers. The triple-headed snake trademark of Razer is one of the most recognized logos in the global gaming and esports communities. With a fan base that spans every continent, the company has designed and built the world's largest gamer-focused ecosystem of hardware, software and services.
Razer's award-winning hardware includes high-performance gaming peripherals, Blade gaming laptops and the acclaimed Razer Phone.
Razer's software platform, with over 40 million users, includes Razer Synapse (an Internet of Things platform), Razer Chroma (a proprietary RGB lighting technology system), and Razer Cortex (a game optimizer and launcher).
Razer services include Razer zGold, one of the world's largest virtual credit services for gamers, which allows gamers to purchase virtual goods and items from over 2,500 different games.
Founded in 2005 and dual-headquartered in San Francisco and Singapore, Razer has nine offices worldwide and is recognized as the leading brand for gamers in the USA, Europe and China. Razer is listed on the Hong Kong Stock Exchange (Stock Code: 1337).

Now enjoy 5 Years Warranty on Cooler Master Entry level PSUs

$
0
0

Cooler Master Upgrades Warranty on its entry level PSUs to 5 years!!

 
05th February 2018 Mumbai, India
Cooler Master, a leader in design and manufacturing of computer components and peripherals, today announces its decision to upgrade the warranty on its entry-level PSUs to 5 years. Generally, the entry-level power supplies are warranted against manufacturing defects and failure, anywhere between 2 to 3 years, however, Cooler Master as a leading brand in this space, wants to offer its consumer complete peace of mind by increasing the warranty to 5 years!
 
“Since last few years we have taken a serious approach towards bringing even better quality to consumers. With that in mind, we had revamped our entire series. The MIJ 1200W was the first to bring the best that is there to PSUs, from there on, we took the entry level and decided to set new benchmark! MasterWatt Lite (MWL) and MasterWatt E (MWE) our entry-level PSUs with upgraded internals offer excellent value, given their revamped internal circuits that can stand against harsh Indian power conditions. We are so confident on their quality that we have decided to increase the warranty to 5 years and offer our consumers total peace of mind.” – Said Sanket Naik – Country Manager, India.

Details:
The following power supplies from CoolerMaster sold from January 2018 will carry 5 years warranty. The complete warranty terms can be found here; http://bit.ly/2E1GTSZ

PSU Series
Model
Warranty
MasterWatt E Series
5 Year Exchange warranty
MasterWatt Lite Series
5 Year Exchange warranty

*We suggest end-users to register their power supplies after purchase for quick and efficient RMA process.

###

About Cooler Master
Cooler Master is a Taipei-based, global computer components company with more than a 20-year track record in releasing innovative products that truly advance the industry. We are driven by a passion for the things that make building a PC such a unique, rewarding experience, and sustained by a vision that we can reinvent the way these machines are designed, made and used. From our landmark release of the first ever aluminum PC case to our groundbreaking switch to the modular format, Cooler Master is committed to bringing our customers and fans the utmost in choice and control. For more information on Cooler Master, please visit www.coolermaster.com or follow us on Facebook

Rapoo India introduces the VPRO VH150 Backlit Gaming Headset

$
0
0
 
Mumbai, India, February 8, 2018: RAPOO - a leading manufacturer of wireless peripheral products, has introduced the new VPRO VH150 Backlit Gaming Headset in the Indian market.

Rapoo, which is a known global player for wireless products and accessories, has recently introduced its Gaming brand VPRO in India to cater to gamers who wish to enjoy affordable gaming accessories.

The Rapoo VPRO VH150 Backlit Gaming Headset comes with a Cool Blue LED Backlight to appeal to stylish gamers. It also provides professional adjustable sound modes for a superior gaming audio experience. The microphone is designed to be easily detachable from the main headset to offer flexibility during gaming and comes with a mute switch as well.
The VH150 is manufactured with ultra-strong and durable materials to be able to withstand long hours of gameplay. It is also equipped with a noise-isolating over-ear design with soft and comfortable earcups. Moreover the control on the wire comes with multiple functions such as the volume control and the LED switch.

Talking about the launch, Mukesh Chaudhary, Country Head, India, SAARC & ME, Rapoo Technology said, “The Rapoo VPRO VH150 combines the essence of technology and ergonomics for gaming. Our VPRO range of gaming products are specially designed for gamers and eSports players who desire to enjoy gaming products at affordable prices.”

The Rapoo VPRO VH150 Backlit Gaming Headset is now available in India offline as well as online via Rapoo’s authorized partners.

Product Information link - http://www.rapoo.com/product/392

###

About Rapoo
Founded in 2002, RAPOO is dedicated to offering excellent, cutting-edge wireless peripheral products to users around the world. “Wireless Your Life” is the simple philosophy that RAPOO has always adhered to.

RAPOO has constantly paid close attention to the continuous changes in user demands and to providing corresponding solutions. The RAPOO range of wireless mice, wireless keyboards, wireless headsets and wireless speakers is tailored to meet the needs of PC users. Bluetooth headsets and Bluetooth keyboards for intelligent terminals, like mobile phones and tablet PCs, are further featured in RAPOO’s broad portfolio. Multimedia keyboards and Multi-Link (dandelion technology) product suites for the home theater round out the RAPOO range.

Corsair H150i Pro RGB Review

$
0
0

Corsair H150i Pro RGB - When great performance meets RGB goodness!!


Last year at COMPUTEX Corsair dropped a hint that it is working on an entirely new series of AIO coolers which would not only be different in looks but also mark Corsair's entry into a new realm of CPU Liquid coolers. And here we are today with Corsair dropping two new coolers in the market namely as the Corsair H115i Pro RGB and the Corsair H150i Pro RGB which are not only in the much needed RGB flavor that Corsair AIO were lacking behind in but the H150i Pro RGB marks the first ever 360mm AIO cooling unit from the house of Corsair which with the current generations of Threadripper and Skylake X processors are a must for high end builds!
Thanks to Corsair India today I have with me the flag-bearer of this new lineup, the Corsair H150i Pro RGB CPU Liquid Cooler for review and I can't be any more excited than this to test this beautiful yet massive unit.

With a price tag of $170 the Corsair H150i Pro RGB is the first of the two to initiate the Pro series of coolers from Corsair and is equipped with three 120mm ML120 Quiet edition high static pressure magnetic levitation fans making it a 360mm unit with an entirely new pump design which boasts RGB lighting and support for Corsair Link software, hence the 'i' in the name, for a bunch of features and customization. The cooler comes backed up with the Corsair 5 years warranty.

What's in the Box!?


Corsair has packed the H150i Pro RGB in a thick and heavy cardboard box just like all of its coolers and the color scheme of black and yellow is also there that we are used to now from them with all their products but this time we also see a hue of colors in the backdrop of the image of the cooler imprinted on the front that signify the RGB nature of the cooler. All the features are neatly printed on the front itself such as compatibility, use of ML120 fans, RGB pump header and the 5 years warranty support.


Inside we find the cooler & all its components packed safely inside a molded cardboard frame which is good enough to cushion a unit of this size and weight.
Content wise the package includes the H150i Pro RGB cooling unit, three 120mm ML120 Quiet edition PWM fans, a Corsair Link cable, AMD bracket, Intel backplate, stand-offs, washer and screws for installing the cooler and fans along with the warranty leaflet and installation guide.

A thing worth noticing here is that Corsair has not provided a separate backplate for AMD platforms which is a wise move since they already come with a metal backplate on the motherboards, also the AMD bracket has a different installation process now which is more simple and quicker to which I will come later on.

Let's take a Closer Look


Corsair H150i Pro RGB is a completely different from any of its predecessors in terms of almost everything, at-least from the outside. The pump and cold plate unit on the H150i, which is an Asetek design,  is quite sleek and made out of premium quality glossy plastic. The top has the Corsair logo which is RGB LED backlit along with the whole outer lining of the black portion.
Also the Intel bracket comes installed out of the box and can be easily swapped with the AMD one by a turn and pull method to simplify the process. The micro-USB port on one side is for connecting the Corsair Link cable that the cooler comes with.

The cold plate comes pre-applied with a thermal paste and looking closely we can see that the copper base plate is not perfectly smooth but has some machine marks on it which shouldn't be an issue in cooling as almost all Corsair AIOs that I've used so far had the same finish but delivered nicely in cooling.

Corsair has used a 350mm long Polytetrafluoroethylene (PTFE) braided tube on the H150i Pro RGB which is thinner than the ones which we are used to from Corsair but are extremely flexible and not too hard like the ones on the H100i GTX that caused issues when routing them inside tight spaces! I'm happy that Corsair made these braided tubes flexible and they can even rotate to a full 90° to the pump unit for easy installation and routing.

A bunch of wires vine out from the pump unit namely as a SATA cable to power the pump, a PWM fan connector to power the installed fans and a Y-splitter to connect the two provided fans. It can surely give a few a hard time to manage so many cables protruding out near the tight CPU area but this is a good arrangement as it sheds the additional load off the motherboard fan header to power the pump and fans all together hence there is no compromise upon the performance.

The fans that comes with the Corsair H150i Pro RGB are the Corsair ML120 Quiet edition magnetic levitation fans that are 120mm in size and are rated at 1600 a rpm max which can move up to 47.3CFM of air at a sound pressure rating of only 25dB. Since this is a RGB lighting oriented cooler its a bit sad that the fans are non RGB since Corsair already has ML120 Pro RGB fans in their catalog which not only look great but would've been an apt addition to his cooler.

Corsair has used a aluminum radiator on the H150i Pro RGB which measure in at 396x120x27 mm and has a high fin density of 20FPI (Fin per Inch) which should be there for a product of this stature. The build quality of this unit is solid and doesn't feel light or flimsy from any angle, support for upto six 120mm fans making a push pull configuration for which the fan screws are provided by default inside the package earning it a few brownie points. As for the aesthetics Corsair has done nothing odd or out of the box here but just put their logo at one end creating a minimalist design rather than the usual plastic strip with logo that runs on both sides of the radiator like that on their previous models.

Time for the fun part - Installation!


Over here I'm going to test the Corsair H150i Pro RGB with my Gigabyte X99 Gaming 5P motherboard which is an Intel Haswell-E/Broadwell-E platform and also can get really hot at times.
We basically need the LGA2011-3 stand offs along with the retention screws for holding the pump in place. The ML120 fans provided with the unit are the simple ones and not the ones with a rubber grommet at the edges so using the provided washers is a good idea to secure the fans nicely upon the radiator. Also the Corsair Link cable is optional and is only needed to control the RGB lights or to set fan profiles otherwise if not used the cooler would work with the LEDs on and programmed to a breathing mode changing color each time.
Its worth mentioning that Corsair has simplified the AMD platform installation with the H150i/H115i Pro RGB to a great extent which no other AIO manufacturer has done so far. To use it on an AMD platform one just has to use the AMD bracket and tighten the cooler upon the default plastic standoffs that the AMD motherboards come with making the installation extremely simple especially for users like me who use the Asus X370 Crosshait VI Hero that needs to have an extra plate removed from its back to install any other after market cooler that has its own backplate!

Once installed and ready I'm very happy with the outcomes as the installation is very simple for this cooler on any platform whatsoever. Since the radiator is thin measuring in at around 27mm the total thickness of this unit even with the ML120fans on is just over 50mm making it widely compatible with most of the chassis that support a 360mm radiator unit. The tubes are flexible and can be turned and twisted in the desired fashion which eases the installation process manifolds even inside a closed chassis such as the Corsair SPEC Omega which I've used here. Even though there are a lot of wires going in and coming out of the pump area tucking them in is not big of an issue and can be done skillfully with patience.

Let's put it to Test!

For testing the performance of the Corsair H150i Pro RGB we'll be using the following test bench -

CPU: Intel Core i7 5930K
Motherboard:Gigabyte X99 Gaming 5P
RAM:Kingston HyperX Predator 16GB DDR4 3000Mhz
Cooler: Corsair H150i Pro RGB
Graphics Card:MSI R9 380 Gaming 4G
Storage:Corsair Neutron XTi 480GB
Power Supply: Cooler Master MasterWatt Lite 700
Case:Corsair Carbide SPEC Omega
OS: Windows 10 Pro 64-bit

Before I move on any further its noteworthy that the Zero RPM mode, which is a new addition and exclusive to the Pro series coolers, is only available if you install and use the Corsair LINK software and cannot be accessed otherwise. This feature turns off the fans completely till the coolant temperature doesn't exceed 40°C and I repeat that its the coolant temperature and not the CPU temperature so be vary. Overall its a welcome addition as not only it eliminated the unnecessary noise production for idle systems but it also brings these coolers in sync with Corsair's PSUs that boast a similar feature such as the AXi series.

Coming back to the testing of the cooler firstly, the CPU is kept at stock speeds with boost enabled and temperatures are measured both at idle and at full load. Then we overclock our Intel i7 5930K to 4.5Ghz at 1.75v which is a bit more than what my chip requires to reach that frequency but I had to add some extra heat to it, the same process as that for the stock speed testing is repeated. Temperature is measured using HW monitor with an average being taken of the temperatures recorded on all six cores. MSI Kombuster utility is what I prefer to stress test the CPU at all twelve threads, I run it for a good 15 minutes before recording the temperatures since by then the temperatures reach a saturation point.
Secondly, the pump is plugged directly into the SATA connector while the fans are plugged into the motherboard fan header via the provided fan extension cable. Fan profile was kept at default from the BIOS itself to rule out any discrepancy whatsoever.
The readings would be shown in delta temperature that is after subtracting the ambient temperature of the room while noise levels are recorded from a distance of three feet from the cooler which is a reasonable and practical distance for such tests.

Temperature wise we can see that the Corsair H150i Pro RGB does a fabulous job for a 360mm AIO cooler especially at overclocked frequencies where it beats similar sized 360mm AIO coolers which is a direct compliment to the improvement in design by Corsair with the pump on this unit. Its noteworthy that the Corsair H115i Pro RGB is near identical in performance to the H150i Pro RGB which is because the H115i Pro RGB uses higher static fans in comparison and the difference between these two units can only be substantially felt once the coolant really heats up and the need for the third 120mm fan on the H150i Pro RGB really comes into play to cool everything down which is only bound to happen under extreme prolonged load on the CPU or while working in a hot room such as in peak summers. Considering my ambient temperature is high and the fan profiles are set to default I'm sure if you set the fan speeds to full or to performance in a cooler environment the results would be even better.

The cooler is a bit noisy I'd say when the system is under full load but at idle state the units is barely audible. Considering its size and the two 140mm fans that come into play the cooler is one of the quietest coolers in its category if not the quietest. This is an improvement over the previous AIO designs from Corsair which tend to be noisy hence the use of ML120 silent edition fans did the job for Corsair offering quieter performance for this unit if not RGB rich.

My Verdict 

Corsair has always brought out some unique AIOs over the year most of them improving over where their predecessor fell short and the same can be said for the Corsair H150i Pro RGB. The H150i Pro RGB has some welcome features that easily outweigh its cons.
The radiator and pump are all solid in build and look elegant from every possible corner with no unnecessary gimmicks! Sleeved tubing is really robust and flexible which is something I love as I've always felt that Corsair tubing has been a bit too rigid but not over here. Cooling performance is really good for a cooler of this category, probably the best amongst the widely available AIOs, and its true power is seen when the processor is overclocked so yet again its proven that this cooler is only meant for people who plan to run really hot/overclocked systems as at stock you'll be better off with a smaller unit. Corsair H150i Pro RGB is one of the quietest 360mm AIOs out there today and that is all because of the improved pump design along with the use of ML120 quiet edition fans. They've compromised raw performance at the cost of silence but you can always swap them with aftermarket fans including Corsair's own ML120 Pro RGB fans to not only reap the full benefits of this cooler in terms of performance but also to complete the whole RGB look that the unit is aimed at.
The RGB lighting on the pump is really soothing and well balanced while the Zero RPM feature is something that every other brand should be taking notes from, a very simple but highly effective move.
"Corsair H150i Pro RGB is a Pro in terms of balance between much needed features, distinctive yet elegant looks and to the point pricing. Highly recommended for someone who's looking at building  a high end system or just want a cooler to make his rig stand out from the crowd!"
Pros - 

  • Solid Build Quality 
  • Excellent Cooling Performance 
  • Easy to install especially with AMD platforms
  • Zero RPM profile
  • Corsair Link support
  • Silent
Cons - 
  • Included fans are non RGB
  • Not compatible with AMD Threadripper 
I give it a 8/10 earning our Gold Award!

AMD launches the new Ryzen desktop CPUs with RX Vega Graphics

$
0
0

New Quad-Core Ryzen™ 5 2400G and Ryzen™ 3 2200G Desktop Processors Combine
High-performance Radeon “Vega” Architecture with Revolutionary “Zen” CPU Cores on a Single Chip 

AMD Ryzen Desktop APUs Deliver Superior Console-Class HD Gaming Performance on Your Desktop, and Give Discrete Graphics Some Serious Competition Starting from $99

 
NEW DELHI, India — February 12, 2018 — AMD (NASDAQ: AMD) today introduced the world’s most powerful graphics on a desktop processor with the release of two Ryzen™ Desktop processor with built-in Radeon™ Vega graphics models.1 Now available, AMD Ryzen™ 5 2400G and AMD Ryzen™ 3 2200G processors combine four of the latest “Zen” CPU cores with advanced Radeon “Vega” architecture on a single chip, offering leadership levels of system and graphics performance at their respective $169 USD SEP and $99 USD SEP price points.

“When we launched our first Ryzen processors a year ago, we began driving innovation and competition across the PC market. We remain dedicated to this mission throughout 2018, as we further strengthen our Ryzen portfolio by adding two leadership APUs designed to meet the varying needs of today’s PC users,” said Jim Anderson, senior vice president and general manager, Computing and Graphics Business Group, AMD. "AMD Ryzen Desktop APUs are a perfect example of the innovation we bring to market for consumer and commercial PC users. Combining our high-performance CPU and GPU architectures, this new category of Ryzen desktop processors is designed to deliver a smooth overall computing experience, as well as the ability to enjoy true 1080p HD gaming, eSports or advanced display features through the visual fidelity of the built-in Radeon Vega graphics."

An advanced feature set further enhances the performance of Ryzen desktop APUs. Improved AMD SenseMI technology enables lower power usage at higher frequencies and reduced memory latencies. The new APUs also support Precision Boost 2, a multi-core boost algorithm that enables higher frequencies in gaming and real-world applications. And, with their built-in graphics, these new processors are compatible with Radeon™ FreeSync technology and compatible displays for effortlessly smooth gameplay.

HIGH PERFORMANCE COMPUTING

The Ryzen 5 2400G processor delivers

  • The same graphics performance in a single processor as combining the $199 USD Intel Core i5-8400 with an $89 USD NVIDIA GeForce GT 1030 discrete gaming GPU
  • Up to 156% more graphics performance than the Intel Core i5-8400
  • Up to 21% more system performance than the Intel Core i5-8400
  • Up to 39% faster graphics performance when overclocked

DROP-IN COMPATIBILITY

Continuing the commitment to long-term stability with an exemplary customer experience in mind, Ryzen Desktop APUs support the same Socket AM4 infrastructure as Ryzen™ Desktop CPUs. Therefore, the new processors are compatible with the existing AM4 ecosystem of 120+ motherboards, requiring only a simple BIOS update.

UNLOCKED PERFORMANCE

Like all AMD Ryzen Desktop processors, Ryzen Desktop APUs are unlocked for performance tuning of CPU, DRAM, and GPU settings through the AMD Ryzen™ Master overclocking utility to enable even more performance for users who appreciate the freedom to overclock.

AVAILABILITY

Ryzen Desktop Processors with Radeon Vega Graphics are globally available today through etailers and retailers for use with the wide selection of AM4 motherboards currently in market. Exciting OEM systems with Ryzen Desktop Processors with Radeon Vega Graphics are expected in market in the coming months. Customers can get the latest product pricing and purchase information of AMD Ryzen Desktop APUs at AMD.com today.


###

About AMD
For more than 45 years, AMD has driven innovation in high-performance computing, graphics, and visualization technologies ― the building blocks for gaming, immersive platforms, and the datacenter. Hundreds of millions of consumers, leading Fortune 500 businesses, and cutting-edge scientific research facilities around the world rely on AMD technology daily to improve how they live, work, and play. AMD employees around the world are focused on building great products that push the boundaries of what is possible. For more information about how AMD is enabling today and inspiring tomorrow, visit the AMD (NASDAQ: AMD) website, blog, Facebook and Twitter pages.

Corsair K68 RGB review

$
0
0

Corsair K68 Gaming Keyboard - You won't regret if it spills out this time!


Corsair is a brand name that needs no introduction, every PC gamer or enthusiast has come across the brand in one way or the other be it through their famous Hydro series CPU liquid coolers, Power Supply Units, Chassis or even the very reliable Memory kits.
Corsair has been constantly innovating and upgrading their keyboard lineup mainly courtesy to their partnership with Cherry, a global leader in manufacturing keyboard mechanical switches. Talking about innovation what do you do when you've done almost everything in the field of gaming keyboards by launching the likes of the K70 and even the uber premium K95 Platinum? Well it simple you make them spill and dust proof! Why? Because you can and most of the people these days need it especially who tend to use their gaming stations as their lunch stations aswell!
The Corsair K68 RGB Gaming Keyboard aims to do just that and much more with its new RGB flavor taking the story ahead where its predecessor the K68 left the ball with its all red backlit LEDs. Thanks to Corsair India I'm having one on my table right now for review.

The Corsair K68 RGB is a standard sized gaming keyboard with identical features under the hood like the older K68 like a 1000Hz polling rate, 100% anti-ghosting, media keys, per-key LED lighting and even mechanical keys, the CherryMX Red to be precise. The added RGB lights are customizable using the CUE software and can be controlled in multiple fashions. Its rated for IP32 protection to earn it that 'spill and dust proof' tag and we'll discuss it later on on how just that really is.
Priced in at $120 the K68 RGB is around $30 over than the basic K68 while both are backed up by a solid 2 years Corsair domestic warranty.

What's in the Box!?


Corsair brings the K68 RGB in their now signature black and yellow packing. The Corsair logo is at the top left corner followed by the product name, with a boxed RGB, and Cherry MX switch glimpse at the bottom right corner. A large glossy picture of the keyboard occupies most of the front side along with streaks of RGB hues in the backdrop to signify its RGB nature.

Flip the box and at the back you see that Corsair has clearly mentioned the spill and dust free function along with basic details about the keyboard and its layout via a marked diagram. Yes, its CherryMX Red we get that by now but yet again its mentioned all over again.
All in all the outer packing is brilliant and goes perfectly with the theme of the board.

Inside the box there is another thin black box that contains the contents in a tight and organized manner. The packing is neat and organized to avoid any damage while transit to this product which is a good move in my view.

Open the black box and you'll find the K68 RGB keyboard, a detachable wrist rest, a user manual and warranty card. The accessories with this keyboard are bare minimum and even lack the Corsair signature contorted textured keys that come with most of their keyboards now. The only possible reason can be the cost cutting factor here but a few plastic caps wouldn't have hurt that much and moreover would've given the RGB variant of this keyboard a much more desirability factor over the non RGB version of the K68.

The K68 RGB Keyboard! 


Looking at the keyboard itself you realize immediately that its similar to the K series keyboards from Corsair and is quite boxy in terms of looks. The Corsair K68 RGB clearly seems to bridge the gap between the K63 and the Corsair STRAFE with a bit more features and keys than the former but lesser number of colors than the latter. Look closer and you'll find that its identical to the K68 in terms of physical appearance.

This 1.12Kg matte black keyboard is basically all plastic and no metal, not even to the least of bits. This is primarily done to save cost aswell as to avoid any accidental shocks in case of a liquid spillage. The layout is pretty basic and you get the standard Corsair keys with the space-bar key being textured.
An interesting thing I noticed about this keyboard is that that Windows keys are really slim in comparison to the CTRL or ALT keys. This is strategically done to ease the access of Space-bar and CTRL keys together minimizing the distance between the two to make it a more 'gamer friendly' design.

At the back nothing much is going on and we find five rubber feet to securely hold the keyboard in place once placed on a surface to avoid slipping and unnecessary budging. These feet do their job quite well for a keyboard of this size and weight plus you get two stand offs to tilt your keyboard a bit if you like to. So nothing much to discuss or complain about over here.

The wrist rest provided along with the K68 RGB is made out of plastic and a very thin one to be precise with the top textured area being made out of plastic only and not rubber. Its a uni-body design so the wrist mat is fixed and no swap-able. But it gets the job done and only poses discomfort during gaming marathons or while typing long reviews such as this since the textured plastic is hard with no cushioning.

Corsair oddly opted to use a non braided silicon coated USB wire to connect and power the K68 RGB, again! A move which is totally unfathomable since its not a cheap keyboard both in terms of price and feature set so a braided cable is the least one would expect. Thankfully this silicon material isn't too hard and I didn't face any problems in straightening the cable out before use. The cable is a standard Corsair cable with a large plastic head at the end with no USB Pass Through wire.

The Corsair logo this time is non-backlit and is a plain silver Corsair sails logo which is definitely not a finger print magnet and compliments the color scheme and design of this product. Sadly this keyboard doesn't have a USB port on board like the other K series boards and even the STRAFE which is basically done to seal out any open areas for liquid to seep in from. Guess spill proof has its own price.

Very much like the other gaming keyboards the K68 RGB even comes with on board multimedia buttons which are located to the top left corner just like the old one. These feel nice upon pressing and have a nice feel to them but sadly the volume control is done by three buttons rather than a dial which I'd thought would become a standard for all the budget/upper budget keyboards from Corsair after they implemented it successfully in their K95 Platinum.
Turn your gaze a bit to the left of the media keys and we find two dedicated buttons for two specific functions namely as Light brightness control & Windows lock key. The brightness control buttons lets you switch between three levels of brightness and even switch off the lights completely while the Windows lock key  simply locks both the Windows keys on the board to avoid irritating moments when you simply jump back to the desktop from the middle of a game by an accidental press of a button!
Also I don't think that the media keys nor these two keys discussed above are spill proof and I was wary to test it out myself so if you buy this keyboard make sure you don't go berserk with liquids just for the sake of fun.

For those of you not aware of the fact, mechanical keyboards are a great performer but at the same time noisy due to that clicking spring under each key but Corsair overcame this problem to quite an extent by putting a damping material right inside the switch housing, this patent and exclusive to Corsair key is known as Cherry MX and is present in all the new fleet of Corsair keyboards including the K68 RGB. Simple yet effective move I'd say!
Also these are Cherry MX Red switches which have a actuation force of 45g and 2mm depth. These are almost identical to the Speed Switches with just a difference of 0.8mm on paper and are used in the K63 and STRAFE aswell.

Take off the key caps and you'll find yourself the conventional CherryMX Red switches at the heart of the K68 RGB Gaming Keyboard. The only thing noticeable here is this translucent white colored silicon like protective material which is quite soft and reminds me of something more intimate! It prevents the liquid spilled on the board from entering inside and damaging the electronics and PCB underneath and hence making it spill proof. This is white in color on the K68 RGB contrary to the K68 which used a similar material but in red color since it was red backlit only but here due to the RGB nature this whit-ish layer doesn't hinder the RGB glow from the lights underneath.
Also this cover on the K68 RGB doesn't make contact with the keycaps and hence makes the sound a lot different from the original K68 to which I'll come later on.

One thing that is fairly noticeable here is that the LED lights are greatly defused in the K68 RGB with no bleeding issues. This has been achieved mainly by the lower cap height & the protective layer underneath which kind of contains the lights within allowing no bleed out.
Lower cap height also helps in tackling with dust accumulation in the long run so making it dust proof.


Nothing special just a bunch of photographs I managed to click with different lighting configurations and the new RGB flavor!

Corsair Utility Engine (CUE)


Corsair has brought out an entirely new software suite with the K68 RGB Gaming keyboard. CUE as Corsair likes to call it is a suite to bind all the three gears, namely as the Void Pro Wireless Headset, MM800 Mousepad and Glaive Mouse, together as one taking a more holistic approach. CUE can be downloaded from the Corsair official website for free.

This new version of the CUE is quite well laid out and has all the comprehensive and complex options hidden deep within. The demo devices listed on the starting page are actually a bunch of emulators that users can  use to get a feel of the lighting and various options available for the enlisted peripheral. The top has an advanced button for bringing down the more in depth options for the users & I personally advice that one uses the same as its required to reap the full potential of such a premium device!

Select the K68 RGB and you'll find three tabs on the left labeled as Actions, Lighting Effects and Performance. We'll be discussing all these three one by one so let's discuss the first one first that is the Actions sections.

Once entered this section provides a plethora of serious options to the users. Its a section that means serious business and nothing else. The options are Macro, Text, Remap, Media, App Launch, Timer, Disable and Profile Switching.
Macros as the name suggests is the place where you can program all your macros you want to any key you like! Aside from the keystrokes and delays, the CUE software can also record the relative mouse movements, clicks and scrolling. I was amazed to see that you can even set a particular sound to be played when a macro key is pressed along with the ability to assign follow up actions and even repeat rates of the macros.
Text as the name suggests can be used to assign any text message to a key which when pressed will insert the programmed text into the message box or wherever required. Since it actually types the text and doesn't copy paste it the uses of this function is limitless including insertion of cheats at a single key press in classic games like GTA San Andreas or the classic DOOM 3.
Remap Key is simple and is used to remap any key to any other key including mouse clicks! Also you can program a key for the time its held down or for the number of times is pressed a nifty little feature to make your pistol fire like an assault rifle in CS:GO with a single key stroke!
Rest of the options are fairly simple with the App Launch option allowing the user to launch any application through a dedicated key on the keyboard for quick switching.

Lightning Effects is the place where you want to be for customizing the lights and patterns across the board. One can assign different brightness, patters etc to individual keys along with the media keys and mute key! Since its a RGB keyboard so CUE offers similar options for this aswell like the other RGB gaming keyboards from Corsair and you cna choose the color of per key and even customize a particular shade from the color pallet.
These effects and lights once saved would stay on the K68 RGB keyboard even when CUE is not installed on the system via the 8MB onboard memory.

Third section called the Performance section which has some straightforward basic settings including disabling of Windows key and combinations such as ALT+F4 which might be an issue during gameplay. If you feel you can clear the onboard memory aswell of the keyboard to start afresh or update the CUE version too. Not too feature rich section but basic stuff can be found here.

Going to the settings sections you can tune basic settings including polling rate, keyboard layout format and even brightness. Settings for the MM800 Polaris and VOID are even present to give you a taste of these devices aswell. Great marketing from Corsair I'd say!

If you click on the Corsair sails logo on top you'll be greeted with the various profiles that you've created for the keyboard to select from. Its noticeable that you can link a created profile to a certain application on your system aswell so that the keyboard performs accordingly, for example you can make a custom profile for a particular game and link it to that so that the profile loads up when you launch that game or link it to Photoshop or any other content production application to use the created macros for that particular applications on the go without any hassle. This feature somewhat compensates for the absence of the profile switch button on the keyboard.

Performance - Time to put those keys to test!


Whenever I review a keyboard or mouse I like to use the device for atleast a week putting it through my daily usage varying across the week. My usage is obviously more inclined towards typing and I mean lot of typing with various keyboard shortcuts combinations, followed by casual gaming mainly racing, open world or FPS. So lets classify the K68 RGB Gaming Keyboard performance across two broad categories of daily use and gaming.

Daily Affairs

Corsair K68 RGB is a very competent keyboard when it comes to typing paragraphs swiftly and smoothly.  The CherryMX Red switches due to their quick response & lower actuation makes it really easy to type long paragraphs with great speed without hurting your fingertips. Though it does need a little getting used to since the keys are quick but with a few minutes into training your fingers you'll find yourself using it with no problem. Since my fingers are thick I did accidentally push the Caps Lock key at times since the key is quite big and at almost no separation from the main alphabetical keys, people with slimmer fingers might not come across this issue.
I didn't feel much difference between these and the CherryMX Speed switches when it came to typing or anything else & so won't most of the people since the difference is extremely minute. The keys are not slippery and the slim design makes them a good landing pad for the fingers imparting reasonable grip. Overall I loved how the keyboard performs in my daily use.

Game On!

Gaming is the area where this keyboard really shined for me since I personally prefer the CherryMX Red switches for gaming purposes. The keys are just perfect and due to logical actuation force and distance its neither too sensitive nor too hard. I generally find CherryMX Speed switches a bit too quick and can't be used without some practice but these I'd say are a buy and go for most of the buyers out there. Still sometimes I found pressing a key accidentally as my finger was resting over it & managed to press it down just by a little, namely the spacebar.
Rapid key strokes is where the keyboard proves its metal as they keys offer high resistance with distance and hence reset quickly so rapid strokes are easy and swift making it easy in game like Rise of the Tomb Raider.
The keystrokes produce a good clicky sound much like what you expect from mechanical switches especially whose from CherryMX Red. The new white colored silicon mesh on the K68 RGB somewhat doesn't damp the sound unlike the red colored one on the K68 which can be a deciding factor for a few.

Let it Spill Out!


Since the Corsair K68 RGB is marketed as a 'spill proof and dust proof' keyboard I didn't hesitate to spill some water, ice and even coffee over this keyboard and it passed all these testes with flying colors be it while it was powered on or switched off. I was a bit apprehensive so as not to get electrocuted but the K68 RGB didn't pose any such danger due to its well sealed body and all plastic body frame.

Overall the keyboard is rated for IP32 protection and while water level 2 is pretty typical for spill resistant devices, dust level 3 is perhaps a bit more debatable. Dust level 3 means it is protected against objects larger than 2.5mm, which is actually quite large by dust standards. Practically speaking, it might be better to call the K68 crumb resistant, as dust will still be able to make it in tight spaces over time. So in short the Corsair K68 RGB is a snack proof gaming keyboard!

My Verdict 

Corsair did a splendid job with the K68 RGB gaming keyboard in almost every way possible. Its a robust and well build keyboard that oozes quality from every inch of it.
CUE software is more comprehensive and intuitive as ever before and the people at Corsair did a wonderful job at designing this utility keeping every needed feature right where one would like them to be. Thanks to this the K68 RGB gets a plethora of features embedded into it along with the new RGB lights adding some brownie points to it.
Build quality is surprisingly very good for a plastic keyboard which is mainly due to the fact that its all tight and seep proof to keep that IP32 tag intact. I do miss the volume knob and the USB pass through port on this keyboard, a price that one has to pay for a spill proof design. But the absence of a braided cable is something I didn't like at all. RGB LED lights diffuse nicely and don't hurt the eyes or distract one even when brightness is at its fullest.
Keystrokes are swift and feel good under the fingers once got perfectly used to. Gaming or typing a letter to your mom *wink* on the board is a delight making it a versatile keyboard without any restrictions. The silicon material underneath the caps keep them quite and add a nice sound to them when typing.
Coming in at $120 the K68 RGB finds itself in a land full of competitors but simplistic aesthetics and solid build quality along with the IP32 certificate can pave an easy path to success for this keyboard provided the user is ready to compromise USB pass through feature over the others that it offers. Its quite a polarizing product in its own right but with the addition of RGB the K68 RGB surely has made the decision a bit more easier for the potential buyers.
"Corsair has yet again improved and made the K68 RGB a near perfect gaming keyboard for a majority of gamers and content creators offering them something to stay at ease with while working or munching around all laced up nicely in a rich RGB coating!"
Pros -

  • CherryMX Red switches with damping material
  • Good typing and in game performance
  • Spill proof
  • Solid build quality
  • RGB lights are soft and customizable  
Cons -

  • Non Braided cable
  • No extra key caps for gaming 
I give it a 8/10 earning our Gold Award!

Corsair introduces the new Obsidian 500D

$
0
0

This is the New Obsidian Introducing the CORSAIR Obsidian Series 500D


BENGALURU, India / FREMONT, CA - February 22, 2018


CORSAIR®, a world leader in PC gaming peripherals and enthusiast components, today unveiled a stunning new identity for its iconic Obsidian Series of enthusiast PC cases with the launch of the CORSAIR Obsidian Series 500D. Continuing the Obsidian Series' signature elegant and minimalist design, the 500D adds premium smoked glass tempered side panels and curved aluminium construction to create an enthusiast PC case that's thoroughly modern, inside and out. This is the new Obsidian.

With its clean exterior lines, smoked tempered glass side panels and a curved aluminum front, the Obsidian 500D combines minimalist design with the best in premium materials. Solid brushed black aluminum construction is impossible to miss, from the curved door handles, to the front plate and front-to-back top plate. Simply put, the 500D is built better.

Inside, the 500D offers the latest in enthusiast case features making it easier than ever to build your dream PC and keep it running cool. Both tempered glass side panels are hinged to the rear and completely removable, allowing you to keep them out of the way during installation, and front-and-center when it's time to put your PC on display.
Two included SP120 cooling fans and CORSAIR Direct Airflow Path™ design channel cool air where your PC needs it most, with room for up to six 120mm cooling fans or up to a 360mm radiator for the most ambitious cooling setups. Fan trays in the roof and front make installing fans and radiators a breeze, while easily removable front, roof and floor dust filters ensure your build looks amazing and stays that way.

Dedicated, easy-to-use, mounts for up to two 3.5in HDDs and three 2.5in SSDs provide room for expansive storage space, while a PSU shroud and dedicated cable channel behind the motherboard mean that it's easy to make your build look great. Super-speed USB 3.1 Type-C front panel connectivity and a vertical GPU mount* ensure the 500D is future-proof too, ready for not just your next PC build, but many more to come.

Availability, Warranty and Pricing
The CORSAIR Obsidian Series 500D is available immediately from the CORSAIR worldwide network of authorized retailers and distributors as well as direct from the CORSAIR webstore.

The CORSAIR Obsidian Series 500D is backed by a comprehensive two-year warranty and the CORSAIR worldwide customer support network.

For up-to-date and regional pricing of the CORSAIR Obsidian Series 500D, please refer to the CORSAIR website or contact your local CORSAIR sales or PR representative

###

About CORSAIR
CORSAIR is a world leader in providing high-performance PC peripherals and components to gamers, enthusiasts and e-sports athletes.

Founded in 1994, CORSAIR has won thousands of awards for its products including mechanical keyboards, precision gaming mice, wireless headsets, high-performance components that gamers use to build gaming PCs, and the CORSAIR ONE fully-integrated gaming PC.

Copyright © 2018 CORSAIR Components, Inc. All rights reserved. CORSAIR, the sails logo, and Vengeance are registered trademarks of CORSAIR in the United States and/or other countries. All other company and/or product names may be trade names, trademarks, and/or registered trademarks of the respective owners with which they are associated. Features, pricing, availability, and specifications are subject to change without notice.To know more please visit www.corsair.com

AMD Ryzen 5 2400G Review

$
0
0

Ryzen 5 2400G is here, will it accelerate ahead or fall short of the finish line!?


AMD has risen, well yet again, this time its with their much awaited and hyped up line up of new desktop Ryzen APUs namely as the Ryzen 3 2200G and the Ryzen 5 2400G both of which are codenamed Raven Ridge and aim to offer unmatched processing power along with impressive integrated graphics like never before. These processors priced in at $100 and $170 respectively are pitched to be a replacement for the current generation Ryzen 3 1300X and the Ryzen 5 1400 both of which are seated in the same price bracket.
Today thanks to AMD India I have with me the bigger of the two the Ryzen 5 2400G for review on the table and with all the rumors and speculations surrounding it I can't be any more excited to take a look at what this chip has to offer.

Rated at 65W TDP and equipped with a Vega 11 GPU at its core unlike the Vega 8 on the Ryzen 3 2200G the Ryzen 5 2400G is clocked in at 3.6Ghz and 3.9Ghz (boost) which puts it among the highest clocked Ryzen processors till date. Another noticable difference here between the Ryzen 5 200G and the Ryzen 3 2200G is that the former gets SMT support making it a 4C/8T CPU while the latter is just a 4C/4T CPU in all bareness pitching them for different market segments all together. The Vega 11 GPU in light over here has well 11 CU or compute units, hence the name Vega 11, is clocked in at 1250Mhz and has 704 shader processing units which is pretty darn impressive for an integrated graphics chip as this equates to almost twice to thrice more performance than their Intel HD graphics counterparts! The new Ryzen APUs come with an entirely new approach when put under the microscope to which we'll come to in the next section.

The Raven Ridge Architecture & other details


A few things to clear out before we move forward, the new Ryzen APUs are codenamed as Raven Ridge while the other Ryzen processors till date were Summit Ridge but both these Ryzen variants work on the same Zen cores and hence the Ryzen APUs are not different from their CPU counterparts when it comes to the CPU portion only. Also for those who con't know what an APU or Accelerated Processing Unit is well its just a term used for an arrangement where the CPU and GPU are on the same silicon die working simultaneously as co-processors sharing the same data pool or resources. So if by now you haven't got the catch well here it is the 'G' in the new Raven Ridge lineup stands for Graphics and one can easily tell if the processor is a CPU or an APU.
Good news is that Raven Ridge is compatible with older X370 and B350 motherboards via a simple BIOS update so no new motherboard is required in case one plans to upgrade from their older Ryzen CPU to an APU. Also all Ryzen processors are unlocked with all PCH supporting overclocking and with the Raven Ridge the story is no different so yes we can theoretically overclock both the Ryzen 2200G and Ryzen 2400G with ease and that's applicable for both the CPU and GPU parts!
Overclocking here was important to mention as some of you like higher frequencies and with the Ryzen G series XFR is disabled unlike the previous Ryzen CPUs so you get what's on the box as your maximum frequency beyond which you yourself have to push it manually if required but 3.9Ghz is already quite a lot for a CPU of this stature but then something to sooth up the nerves of you overclockers out there.

Looking closely we observe that the new Raven Ridge APUs are based off a single CCX structure compared to the two CCX that other Ryzen processors are based on. While the manufacturing process is still the 14nm FinFet AMD likes to call it 14nm+ for the Raven Ridge probably because they managed to fir the same amount of core for the CPU and GPU in a smaller area. The straightforward benefit by using such a compact structure is almost zero delay or latency while communicating between the various cores and cache lanes but an immediate downside would be that AMD can only stuff in 8MB of L3 cache on a single CCX module compared to the 16MB that other Ryzen CPUs have. Interestingly AMD deiced to half that 8MB again and assign only 4MB of L3 chache to both Ryzen 3 2200G and Ryzen 5 2400G. Comparatively, the Ryzen 5 1400 had an 8MB L3 cache and the 1500X packed 16MB, the 2400G and 2200G will offer just 4MB. As discouraging as it may sound but AMD aims to fill this deficit with higher base and boost frequencies which obviously are quite high for both these APUs.
However, reduced latency for the cache and memory purportedly offsets that capacity deficit and this is actually a result of having less cache and overall AMD believes that this is a net positive improvement for productivity workloads and in particular games which are more sensitive to memory latency.

Another noteworthy thing about the Raven Rudge APUs is that they have only x8 PCIe Gen 3.0 lanes over the x16 PCIe Gen 3.0 lanes that all the other Ryzen CPUs have to offer. Its an arguable move since some might say that anyone with an APU is highly unlikely to upgrade to a GTX 1080Ti or Vega 64 like cards which actually take benefit from all those x16 PCI Express lanes while entry level to mid range cards are happy with just x8 lanes. I however feel that with x16 PCIe lanes a user is open to couple any card with any CPU and since the 2200G and 2400G are very competed CPUs in their own rights a user might feel the urge to use a RX 580 or GTX 1070 with them and on higher settings and resolutions the lesser PCIe lanes would bottleneck the card big time.
Raven Ridge parts also feature support for dual-channel DDR4-2933 memory, which is an important feature for these APUs as memory performance is of utmost importance for integrated graphics. This is not only the highest official support for Ryzen CPUs by AMD so far with the Summit Ridge coming in with official support of DDR4-2666, the main credit to this as per AMD can be attributed to the x8 PCIe Gen 3.0 lanes since that contributes to smaller and more efficient uncore hence a much better on-board memory controller. No matter what the reason is a high official frequency support is always welcome and it does show that AMD is serious about addressing the issues that Ryzen had initially with high frequency DDR4 kits.

Well as we all know that the new Ryzen G series APUs aim at budget to mid-segment users and to bring out a product of this stature in a competitive price point AMD did bring in some cost cutting measures which can be seen in two major areas, firstly you get a AMD Wraith Stealth cooler with the Ryzen 3 2200G aswell as with the Ryzen 5 2400G which would get the job done just fine as these are low TDP chips anways. Secondly, the TIM here is non metallic so a bit higher temperature can be expected from the Raven Ridge lineup but I'm quite positive that this would be still cooler than their current Intel counterparts.

Let's bring it to Test!


Testing the AMD Ryzen 5 2400G is not like what we usually do due to its integrated graphics processor so we'll be first looking at the CPUs raw processing power after which we'll see some gaming and productive benchmarks with the integrated Vega 11 GPU and then with a MSI R9 380 Gaming 4G for a discrete graphics card to get an overall performance analysis.
Since I don't have the official reviewer's kit that AMD has rolled out for the Ryzen APUs so for this benchmarking session we'll be using the Gigabyte Aorus AX370 Gaming 5 motherboard as that's the only AM4 motherboard I have with me right now with an onboard HDMI port for using the integrated graphics that the Ryzen G APUs have to offer. Primary RAM would be the HyperX Predator 3000Mhz kit and we'll see how the system performs with higher speed memories later on.

Upon a simple BIOS update to the latest F22B at the time of writing and using the AMD graphics driver from the official website we booted into Windows without any issues and CPUZ reported the actual speeds, timings and everything perfectly. Its quite impressive since the memory hit the 3000Mhz at rated CL16 using the XMP profile which earlier was quite an issue with Ryzen CPUs due to how the Infinity Fabric works so I'm happy that AMD seems to have improved in this section quite nicely.

Synthetic Benchmarks

For the synthetic benchmarks we'll be running a set of suits to determine the power of the CPU aswell as the GPU both in an attempt to get a broader picture of how the Ryzen 5 2400G performs in rendering and computational applications.

Cinebench R15


We can clearly see that the 2400G is quite fast and leaves the older 1300X way behind both in multi-threaded aswell as single-threaded test but what's truly impressive is that it beats any Intel i3 offering on the list and it won't be tough to predict that the performance is not much slower than the much bigger i5 8400 which unfortunately at the time of testing wasn't available.

wPrime v2.10


Over her we've used the 1024M variant of the wPrime test which is a respectable indication of the computational power of the CPU and also to how well the memory is being utilized by the memory controller since its sensitive to memory aswell. Obviously lower score is better and just like Cinebench R15 the 2400G outshines the Intel i3s and also the 1300X but loses to the Intel i5 8600K by just 5.5%.

PCMark 10


Being the latest offering from Future Mark the PCMark 10 is an extensive suite to measure how fast the entire system is when performing a set of office tasks ranging from video conferencing, web browsing to even rendering. It relies more over higher clock speeds than number of cores so we can expect some different set of results here.
With integrated Vega 11 the 2400G decimates the Intel HD Graphics on any Intel processor but when paired with a discrete graphics card the 2400G is ahead of Intel's entry level to budget offerings and is only a bit slower than the i5 8400 which is a very good sign for the Ryzen 5 2400G.

AIDA64 Cache and Memory Benchmark 


AIDA64 is a reliable tool to measure the read,write and copy speeds of the memory when paired with a particular processor and from what we can see here the Ryzen 5 2400G has an improved memory controller and it has improved so much since the original Ryzen CPUs that it tends to beat even Intel processors in handling memory data this is mainly due to the reduced cache size and single CCX implementation which should benefit the Vega 11 inside greatly, which we'll be looking into shortly.

3DMark Time Spy CPU


3DMark Time Spy being their first ever graphical suite to utilize the DX12 API is a great tool here to see the CPU power on the Ryzen G APU as in part it utilizes CPU only to render a particular section of the benchmark. Again a similar story with the 2400G beating the 1300X and the i3 8100 in CPU based workload.

3DMark Time Spy iGPU


Now to get a better picture I ran the Time Spy benchmark with the iGPU only and in the next section we'll see the overall score with a discrete graphics card in place. Its no wonder now that the Vega 11 is a much superior integrated graphics solution over the Intel HD graphics which are no where close to its performance.

3DMark Time Spy


Now looking at the overall score using the MSI R9 380 Gaming 4G in place the 2400G is beating the 1300X and looming around the mark of the 1600X aswell as the i7 7700K which is quite surprising to me & I'll clear it out soon by running a fresh test with that CPU but for now the Ryzen 5 2400G is proving to be a pretty impressive offering.

7-zip


A test to determine the compression and decompression power of the CPU. The 2400G is quite good here aswell by beating the 1300X aswell as the i3 8100 and G4560 putting a solid foot hold in the budget to entry level segment.

Blender Ryzen


Well Ryzen used it to prove the might of the Ryzen CPUs when the first launched so why not use it now again for the Ryzen G series! This suite basically renders an image of the Ryzen logo using the CPU power alone and measure that into seconds so lower is better here. A respectable score is put up by the Ryzen 5 2400G here which beats the 1300X and similar Intel counterparts, again.

Gaming iGPU and Discrete Graphics Card

Since the Ryzen 5 2400G aims at being an all in one solution for entry level to budget gamers with a Vega 11 integrated graphics I'll be testing each game with the iGPU that is Vega 11 for the 2400G and Intel Graphics for Intel processors after which the same title on the same settings would be played using the MSI R9 380 Gaming 4G to see how well the APU can handle a graphics card of a similar stature as to those of the present generation budget cards like a GTX 1050Ti, GTX 1060 or a RX 470. We'll also get to know as to how much the x8 PCIe Gen 3.0 lanes affect the performance of the card if at all they do by comparing it against a Ryzen 5 1600X and R9 380 combo. Talking about games apart from the usual games that we test I've also included eSport titles this time since the Ryzen 5 2400G aims to be a noncompetitive solution for professional gamers aswell with it integrated Vega 11 GPU.

CS:GO  


What we see here is that not only is the Vega 11 a much better option over the Intel counterpart but also at 720p settings the integrated graphics perform extremely well even when compared to the 2400G and R9 380 combo. Obviously at high resolution the bandwidth comes into play and we see a performance decrease but still its well above the 150 FPS margin which is impressive nonetheless.

Rocket League


Its also a peppy title that's catching up quickly and has really good graphics making it suitable for this test. At High Quality preset and 1080p an APU pushing out over 60 FPS is nothing short of amazing considering the graphics intensive nature of the title and the fast paced rendering it requires due to its gameplay style.

GTA V


Now this game is very graphics intensive for budget hardware of today so I dialed down the settings to normal with almost everything else turned off and using the inbuild benchmark tool we see that the Vega 11 GPU is extremely competent at handling this game pulling out over 60 frames even at 1080p.

Rise of the Tomb Raider 


Using the DX12 API and Medium presets with no additional tweaks we see that the 2400G is able to handle the game well at 720p resolution but takes a massive hit in the 1080p section which I'm sure can be taken over 35 frames easily with additional tweaks but we'll leave that for another day.

Wolfenstein II: The New Colossus


I included this game since at the moment I'm playing it so no specific reason for this, at Low settings we see that the Vega 11 is more than what you can expect from an integrated graphics card rolling out hefty frame rates both at 720p and 1080p settings.

Assassin's Creed Origins 


This game should probably not be on this list due to its extensive graphics nature but I included it just to push this APU to its limit and also to see if it causes any bottleneck to the graphics card with its limited PCIe lanes. What we can see here is a bit interesting, the 2400G can manage over 30 frames at 720p on medium presets which still leaves a few things like texture and terrain quality to high which is quite impressive since one can tweak it further to get more frames and probably make it more playable but at 1080p due to bandwidth limitation it does get too laggy and on the other hand Intel Graphics couldn't complete the test & crashed mid way! Also there seems to be no issue with x8 PCIe lanes on the 2400G with a card such as the R9 380 Gaming 4G which is a good sign and proves AMD's claims. The story would obviously be different with higher power cards.

Memory Scaling


As we all know Ryzen loves high speed memory and with the Ryzen G series it becomes more so important since the integrated Vega 11 GPU relies heavily on memory performance. To see how it effects the performance of the Ryzen 5 2400G I did test Rise of the Tomb Raider at Medium settings again with various possible RAM frequencies using which one expects to buy and pair with this processor. For this test I used the GALAX HOF 3600Mhz dual channel kit but unfortunately I couldn't hit the 3600Mhz mark wit this APU directly and manual overclocking gave loose timings which yielded no noticeable benefits. Due to limited time I'm only able to bring you one game here but will try to update this section soon with more games and higher frequencies.
Yet again we see that 3200Mhz seems to be the sweet-spot for Ryzen processors as the 2400G works wonderfully at this range and the frames are good enough for a smooth gameplay.

Overclocking


Its highly unlikely that you would indulge into overclocking with the Ryzen 5 2400G but since the SKU supports overclocking and so does the X370 and B350 motherboards I gave it try just to give you an insight into the performance.
The Ryzen 5 2400G has a CPU and GPU combo on the same die hence you can overclock one or both of these components though with the stock cooler provided its nearly impossible to attain a stable state with both the CPU and GPU overclocked due to the immense heat that'll generate with the voltage needed to reach an overclocked frequency on both.
I overclocked the CPU first and attained a stable 4Ghz with 1.33v on the core anything more than that crashed the system no mater how much voltage I fed the CPU so this is somewhat the maximum one can reach with this CPU while using safe voltage limits for a prolonged and stable overclock.
The Vega 11 GPU on the 2400G is clocked in at 1250Mhz and can be overclocked via the BIOS only and with the stock voltage its possible to attain a frequency of 1400Mhz on the GPU which can be further pushed to 1500Mhz-1600Mhz with increase in voltage but with the stock cooler its not really possible to increase the voltage much and overclock the GPU as the CPU is also on the same die and when gaming both the components heat up and cause lags or system crashes so to be safe I will stick to the 1400Mhz mark.
The chart above shows scores for each CPU overclock and GPU overclock individually as I couldn't make seperate charts due to limited time, so excuse me for that. Gains are obviously quite high be it on the CPU or GPU part and its pretty impressive what a budget APU can do with just 0.1Ghz bump in frequency.

Temperature


The stock Wraith Stealth cooler does a decent job in keeping the Ryzen 5 2400G cool even under load considering my ambient temperatures are a bit high. The load temperatures in the chart above are during the Cinebench R15 run so you can expect maximum temperatures in the 65-70 range as its a synthetic benchmark and puts extensive load on the APU.

My Verdict

AMD Ryzen 5 2400G is a thing of beauty, there I said it straight! This thing coming in for $170 is almost perfect in every possible sense that one may look at it ticking nearly every right box. The Vega 11 iGPU is extremely competent and not only annihilates any Intel counterpart till date making it look like a tool from the stone age but also offers impressive gaming performance in the 720p realm and a decent one at 1080p for most of the titles especially eSport titles like CS:GO or a casual one like Rocket League.
The 4C/8T structure with 3.9Ghz on all cores is nothing short of impressive since this is the fastest quad-core in the Ryzen series all of which can be clearly seen in the benchmarks that prove it to be a faster option over the 1500X which is only good now if you need those extra PCIe lanes for a high end graphics card but such a combo is highly unlikely. Computational power of the Ryzen 5 2500G is exactly what we expect from a CPU at this price point and beats hammers down the competition from Intel in form of their i3 8th gen processors.
With all that being said its noteworthy that a Ryzen 5 2400G combo with a B350 motherboard is a much cheaper combination than any budget to entry level processor paired with a H110 motherboard and discrete graphics card such as the GT 1030 or the RX 550 since only then you'll match the performance of the Ryzen 5 build with its Vega 11 inside minus any graphics card. Talking about any Coffee Lake entry level CPU you'll end up spending a bomb for a Z370 motherboard right now since there is no official sign of any B350 variant coming in but even if it does you'll need an additional graphics card to match it out even and hence more money in the end.
But all is not good for AMD right now since the Ryzen 5 2400g is a killer but the rising memory pricing is a bigger nemesis for AMD since the  Ryzen G series APU rely heavily on memory speeds and anything over or around the 3000Mhz mark costs too much right now so in case one already owns a pair of high speed memory or can pick one wisely or can afford spending on memory for now and save for a graphics card later on since the prices of graphics card is absurdly high right now then the Ryzen 5 2400G makes a lot of sense for you.
With the Ryzen 2000G series lineup AMD has definitely opened up a huge market for HTPC builders or people looking for mITX builds or just a competent PC to handle their day to day and multimedia work now with enough juice to handle a graphics card upgrade later on all with the same AM4 motherboard which has proved its metal over time by being extremely versatile and feature rich.
"AMD has risen again and this time much higher than before with the Ryzen 5 2400G making it the life saver for eSport enthusiasts, casual gamers and even people looking to build the smallest possible PC without greatly compromising upon raw performance."
Pros -
  • Very well priced
  • Vega 11 GPU is extremely competent 
  • Great CPU performance 
  • Power efficient 
  • Can be overclocked on the CPU and GPU both
  • Uses the same AM4 socket
  • Overall a better & cheaper deal 
Cons - 
  • Needs high speed memory for best possible performance which is expensive at the moment
I give it a 9/10 earning our Gold Award!

 
Viewing all 161 articles
Browse latest View live